Performing de novo assemblies with IRIDA
This is a quick tutorial on how to assemble a set of genomes through IRIDA.
- Pipeline Overview
- Initial Data
- Adding Samples to the Cart
- Selecting a Pipeline
- Selecting Parameters
- Viewing the Results
- Viewing Provenance Information
- Viewing Pipeline Details
Pipeline Overview
The assembly and annotation pipeline built into IRIDA proceeds through the following steps.
- Paired-end reads are merged using FLASh.
- The merged paired-end reads as well as the unmerged reads are passed to SPAdes to perform a de novo assembly.
- The contigs returned by SPAdes are filtered to remove small and low coverage contigs.
- The filtered contigs are passed to Prokka for genome annotation.
- A set of summary statistics are generated for the assembled genome.
Initial Data
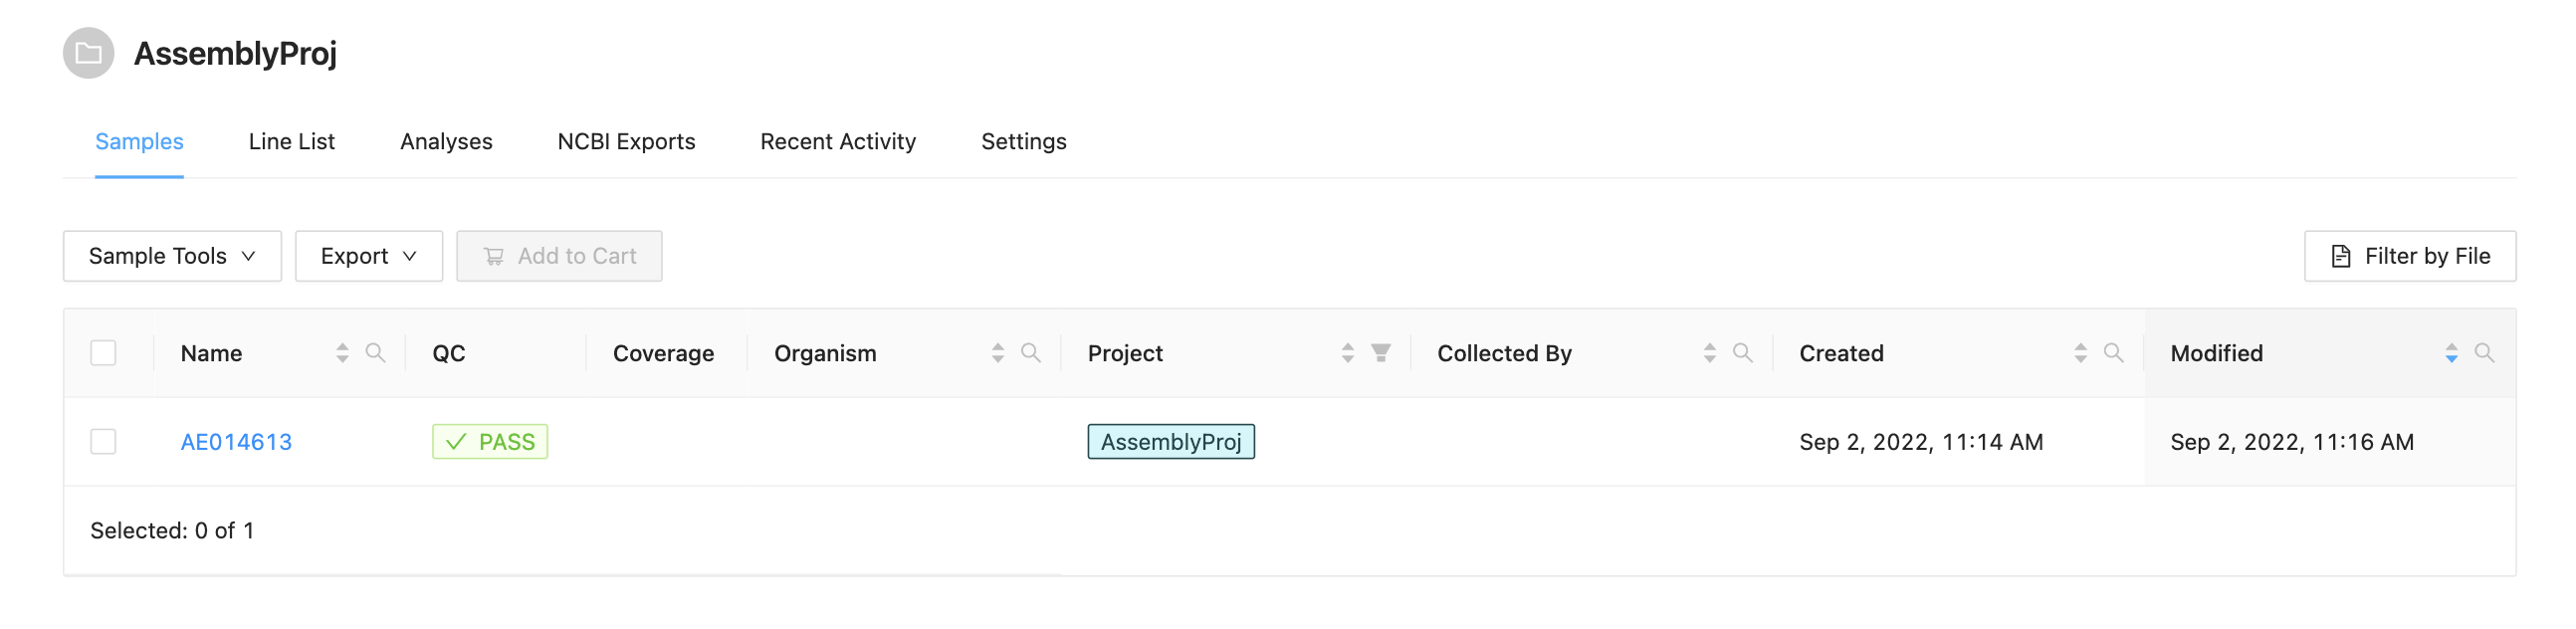
The data for this tutorial comes from the miseq-run-salmonella/ directory within https://sairidapublic.blob.core.windows.net/downloads/data/irida-sample-data.zip. It is assumed the sequence files in miseq-run-assembly-small/ have been uploaded into appropriate samples as described in the Web Upload Tutorial. Before starting this tutorial you should have a project with samples that appear as:
Adding Samples to the Cart
Before a pipeline can be run a set of samples and sequence read data must be selected and added to the cart. For this tutorial please select all three samples and click the Add to Cart button.
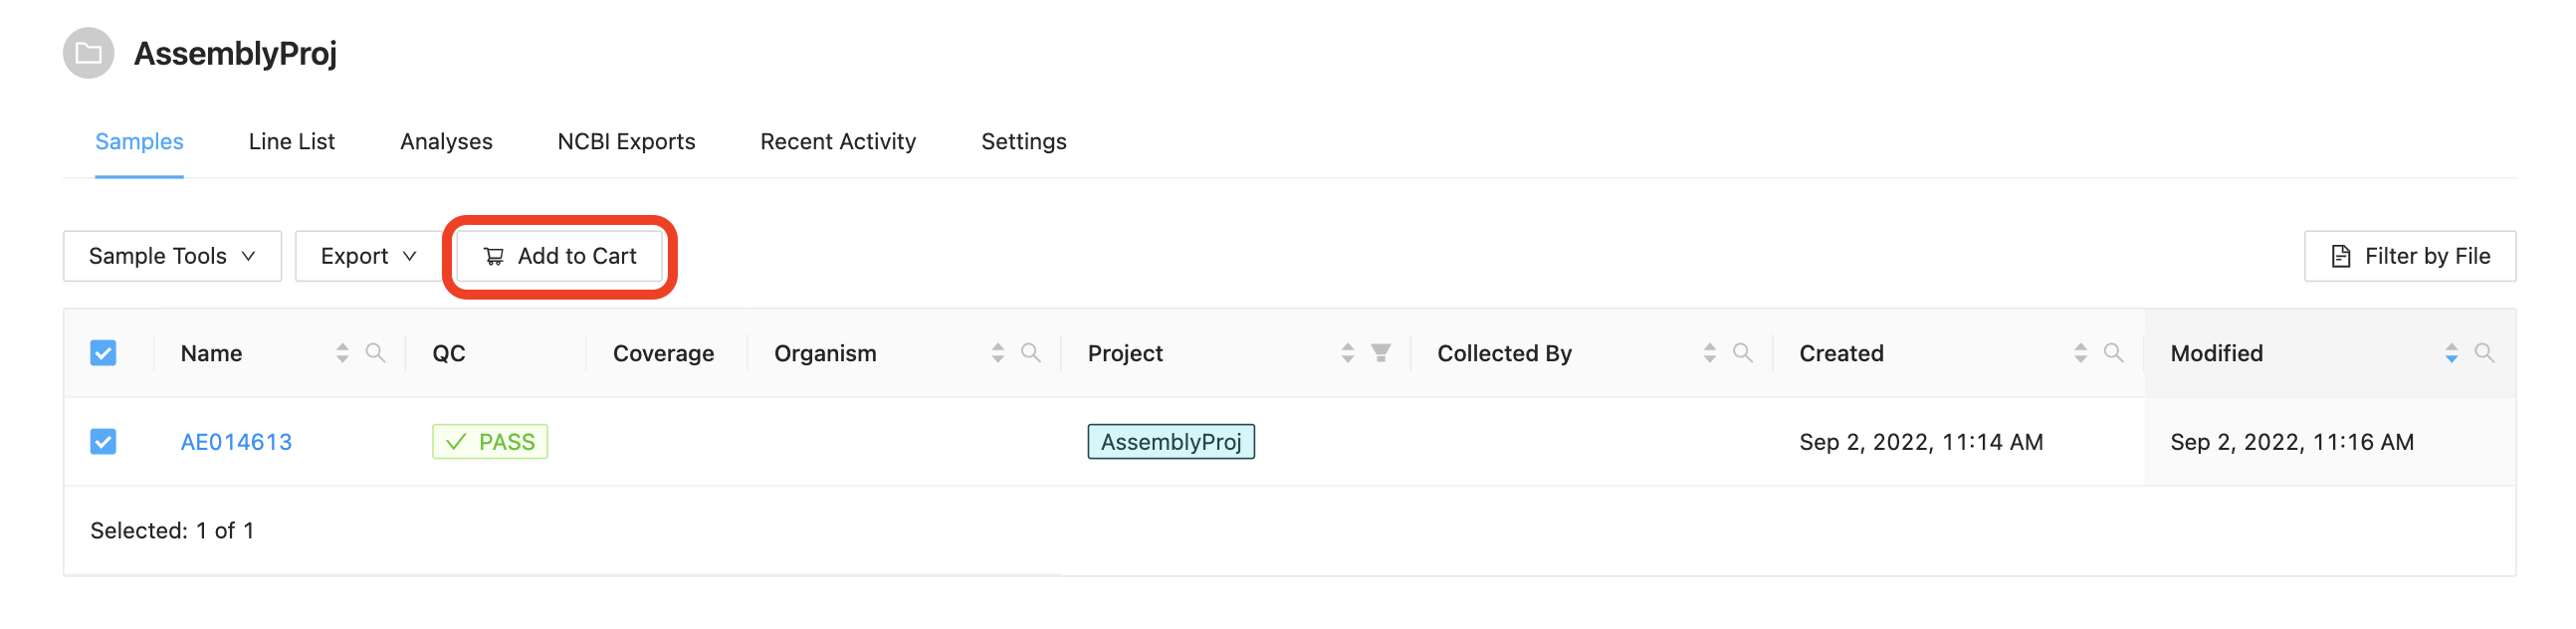
Once the samples have been added to the cart, the samples can be reviewed by clicking on the Cart button at the top.

Selecting a Pipeline
Once inside the cart, all available pipelines will be displayed.
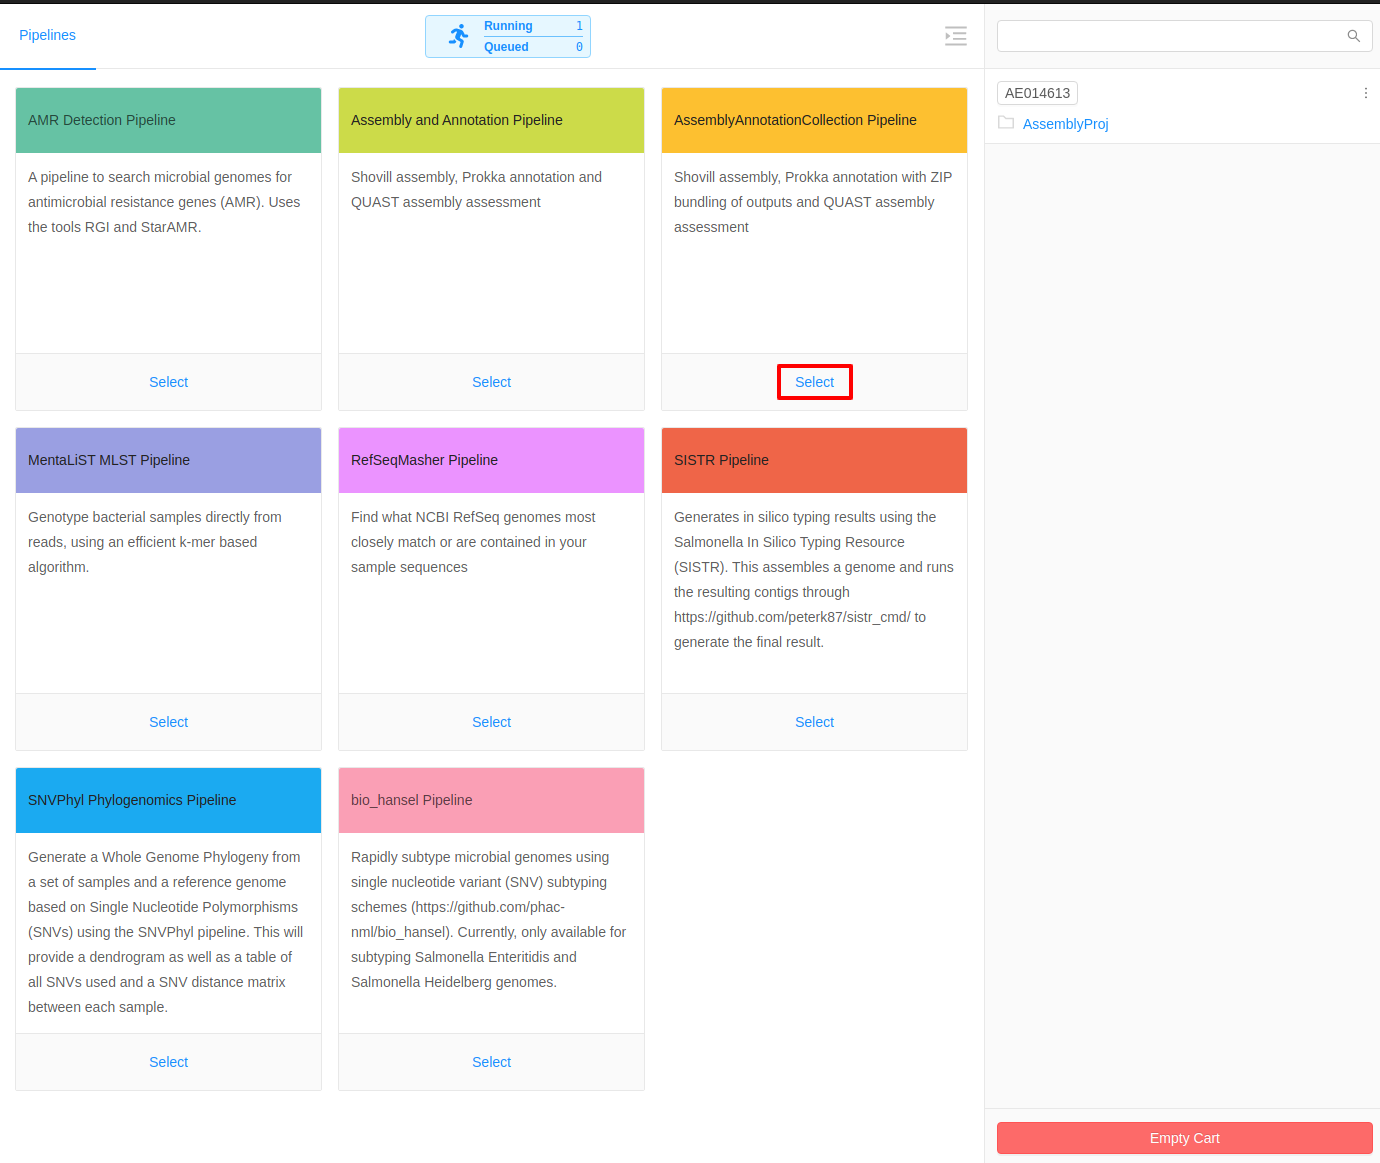
There are two different types of assembly pipelines available:
- Assembly and Annotation Pipeline: This is used for assembling and annotating a single genome.
- Assembly and Annotation Collection Pipeline: This is used for assembling and annotating a collection of genomes and compiling the results into a single downloadable package.
For this tutorial, we will select the Assembly and Annotation Collection Pipeline.
Selecting Parameters
Once the pipeline is selected, the next page provides an overview of all the input files, as well as the option to modify parameters.
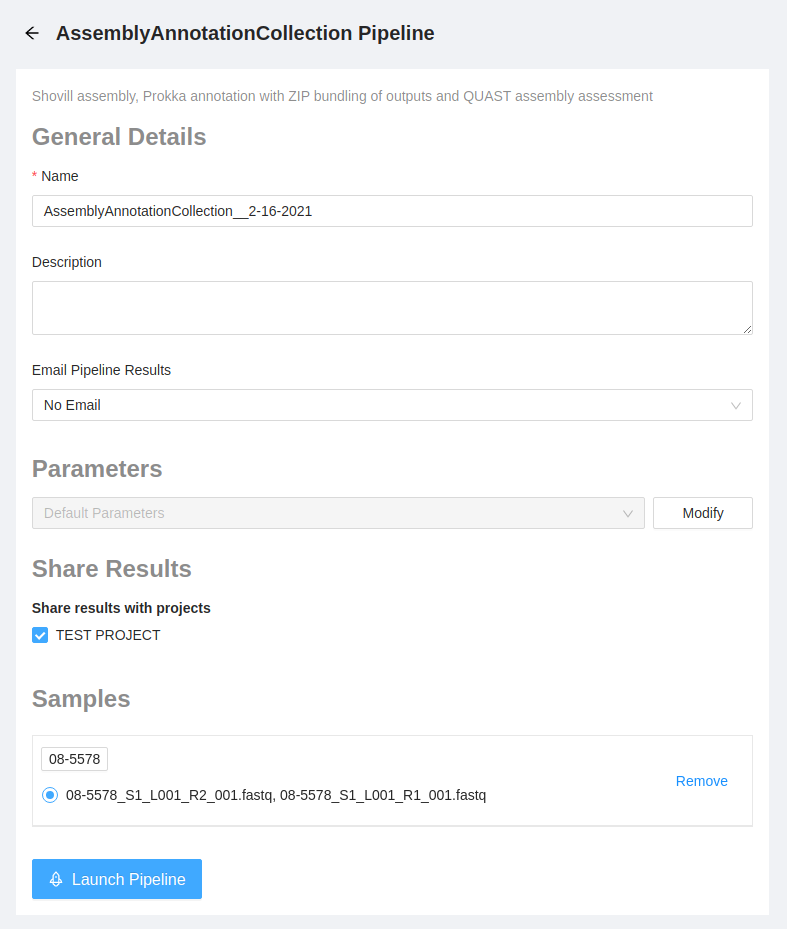
We will use the default parameters. Please select the Launch Pipeline button to start the pipeline.

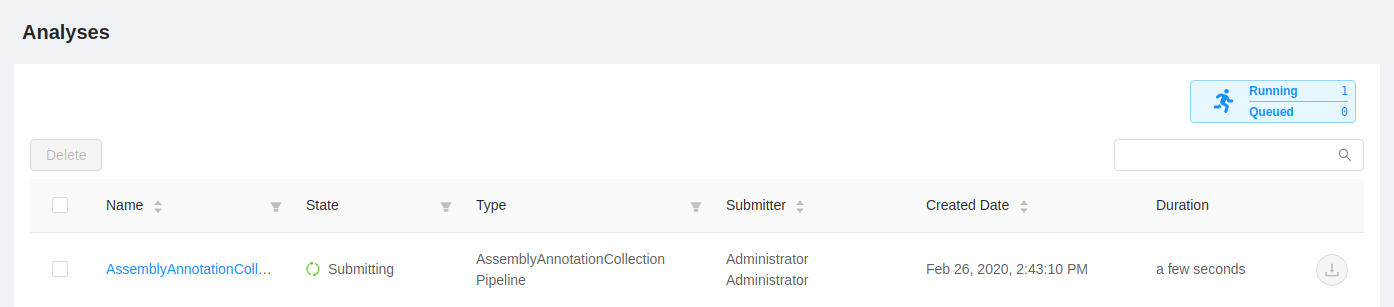
Once the button is selected, the pipeline is initialized and you will be redirected to the analysis details page. From this page you can monitor the status of the workflow.
You can also find your analyses any time through the main menu by clicking on the “Analyses” > “Your Analyses” link.
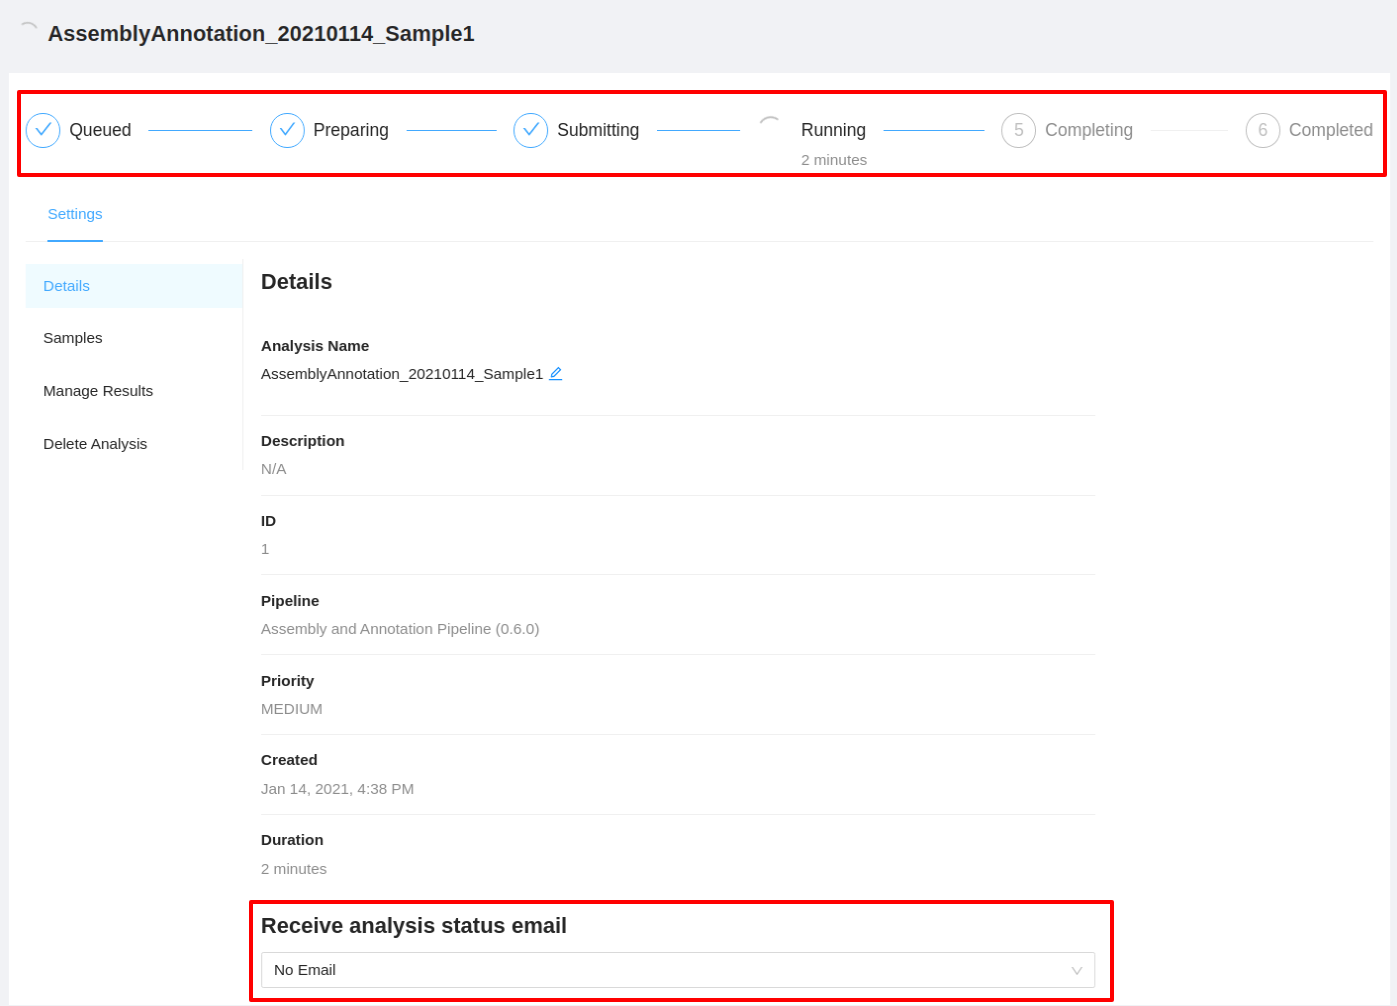
Clicking the pipeline name will bring you to a page for that analysis pipeline. It will take a few minutes for the assembly and annotation collection pipeline to complete. Along the top of the page you can check the current step of the analysis and at the bottom of the Details tab you can select if you would like to receive an email upon pipeline completion or error. The email option is only available if the analysis is not in COMPLETED or ERROR state.
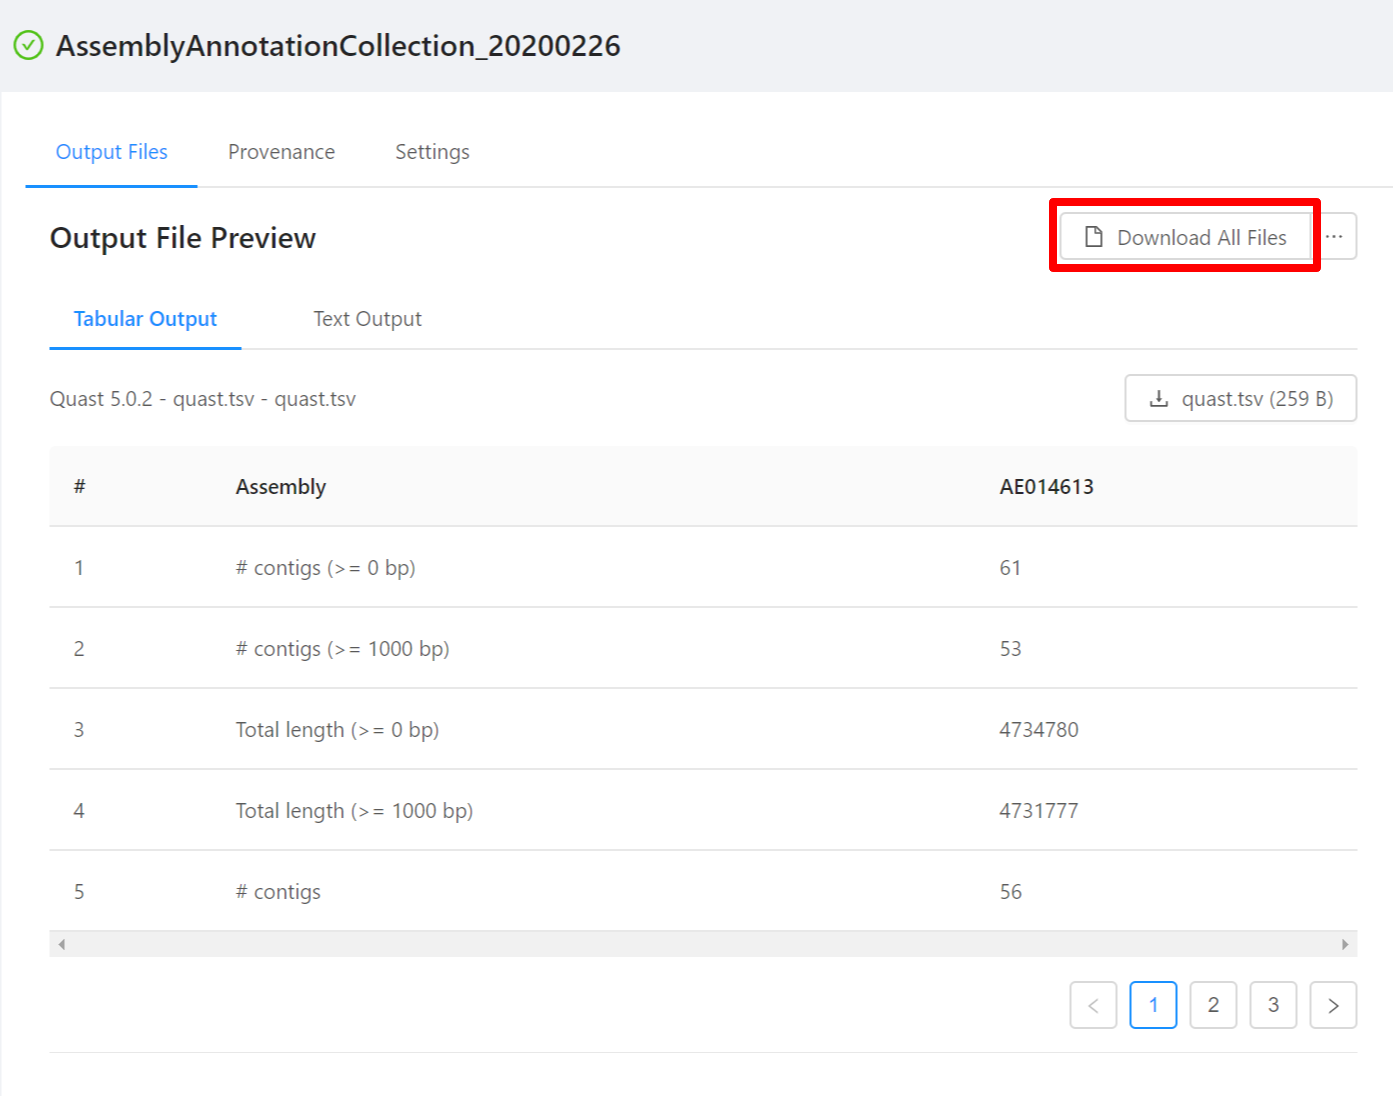
Viewing the Results
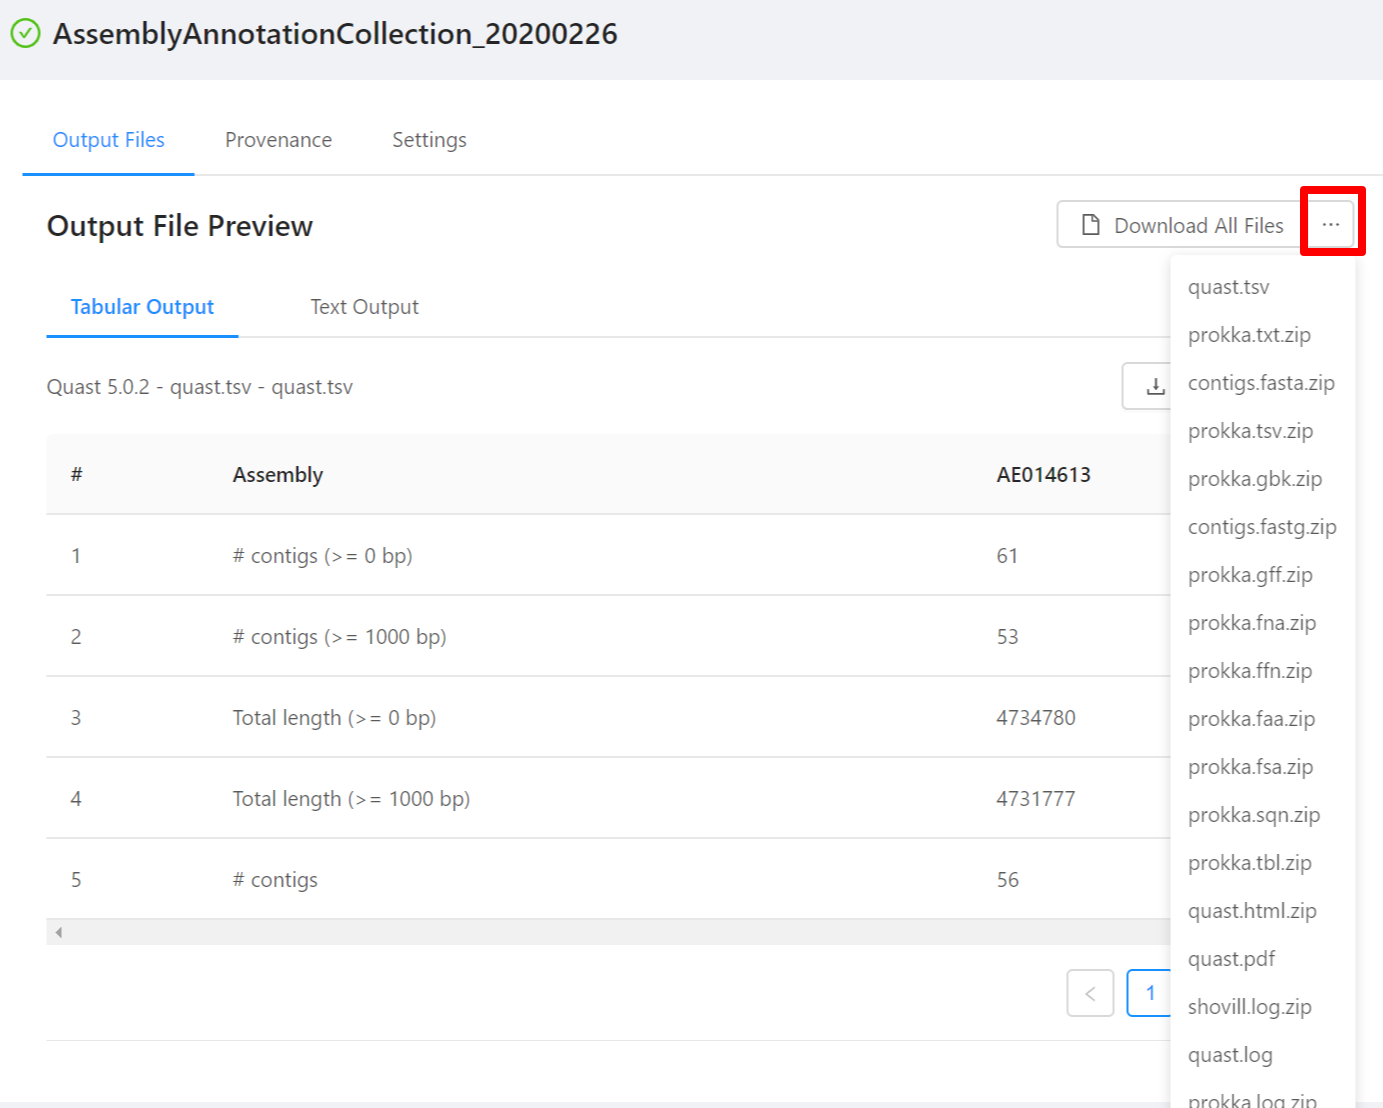
Once the pipeline is complete, you will be able to view the results of the AssemblyAnnotationCollection analysis. Note that not all files have an available preview and as such are not displayed in the Output File Preview but are downloaded when selecting the Download All Files button.
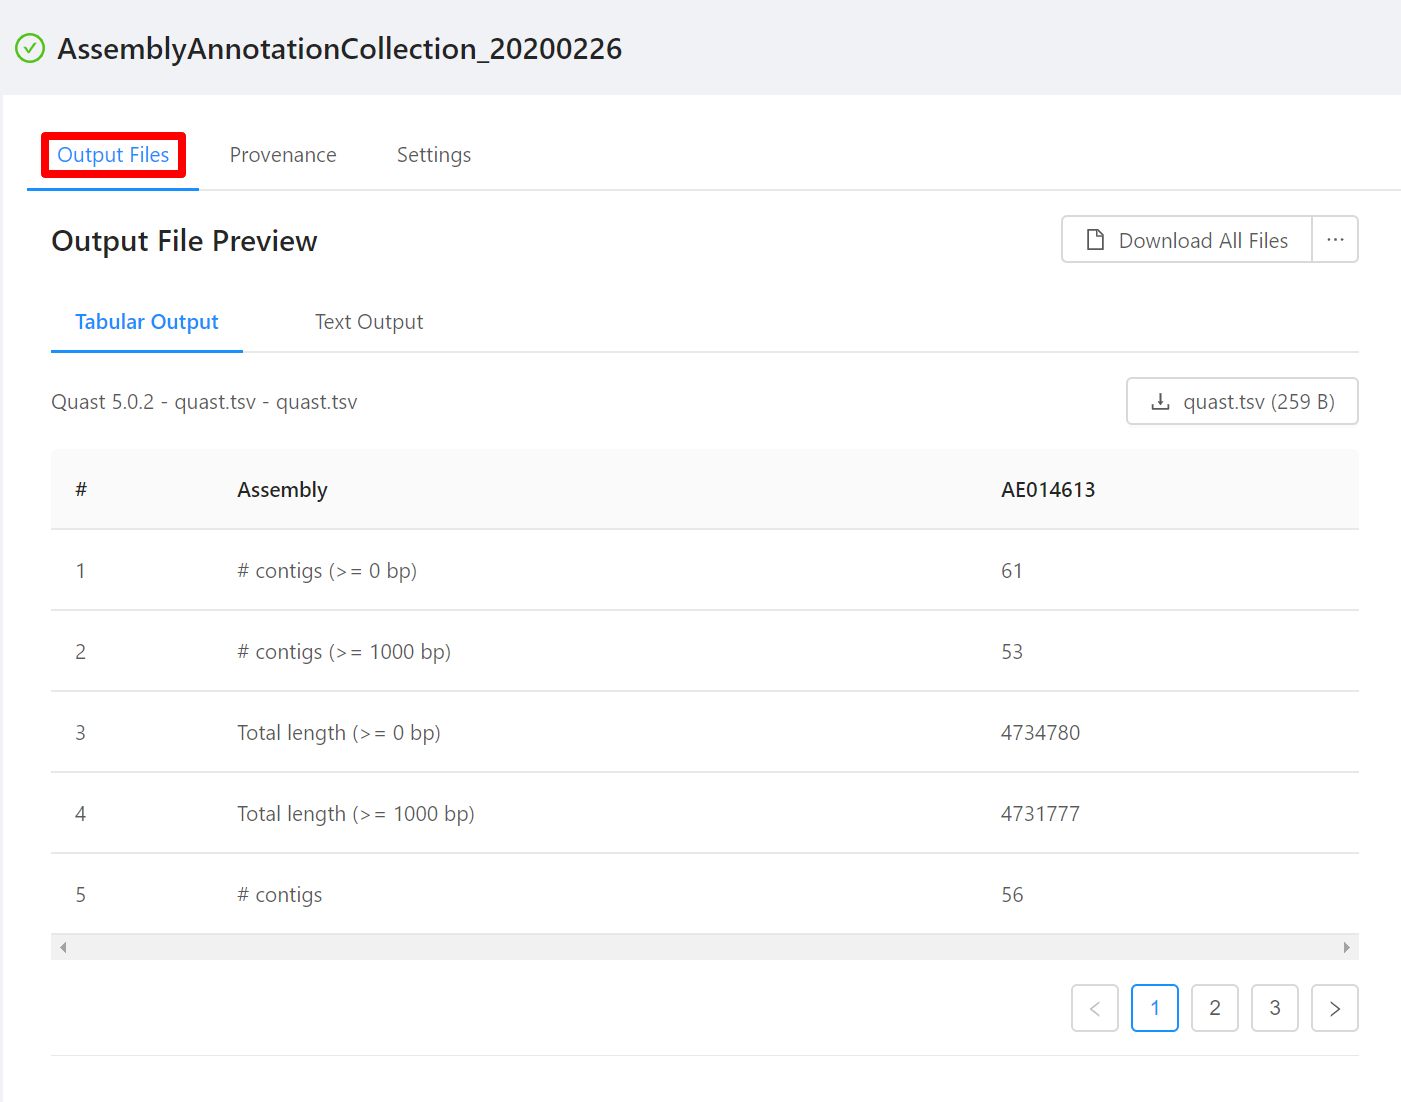
To download individual files select the … next to the Download All Files and select the file to download.
To download all the files generated by the analysis, please select the Download All Files button.
Viewing Provenance Information
To view the pipeline provenance information, please select the Provenance tab.
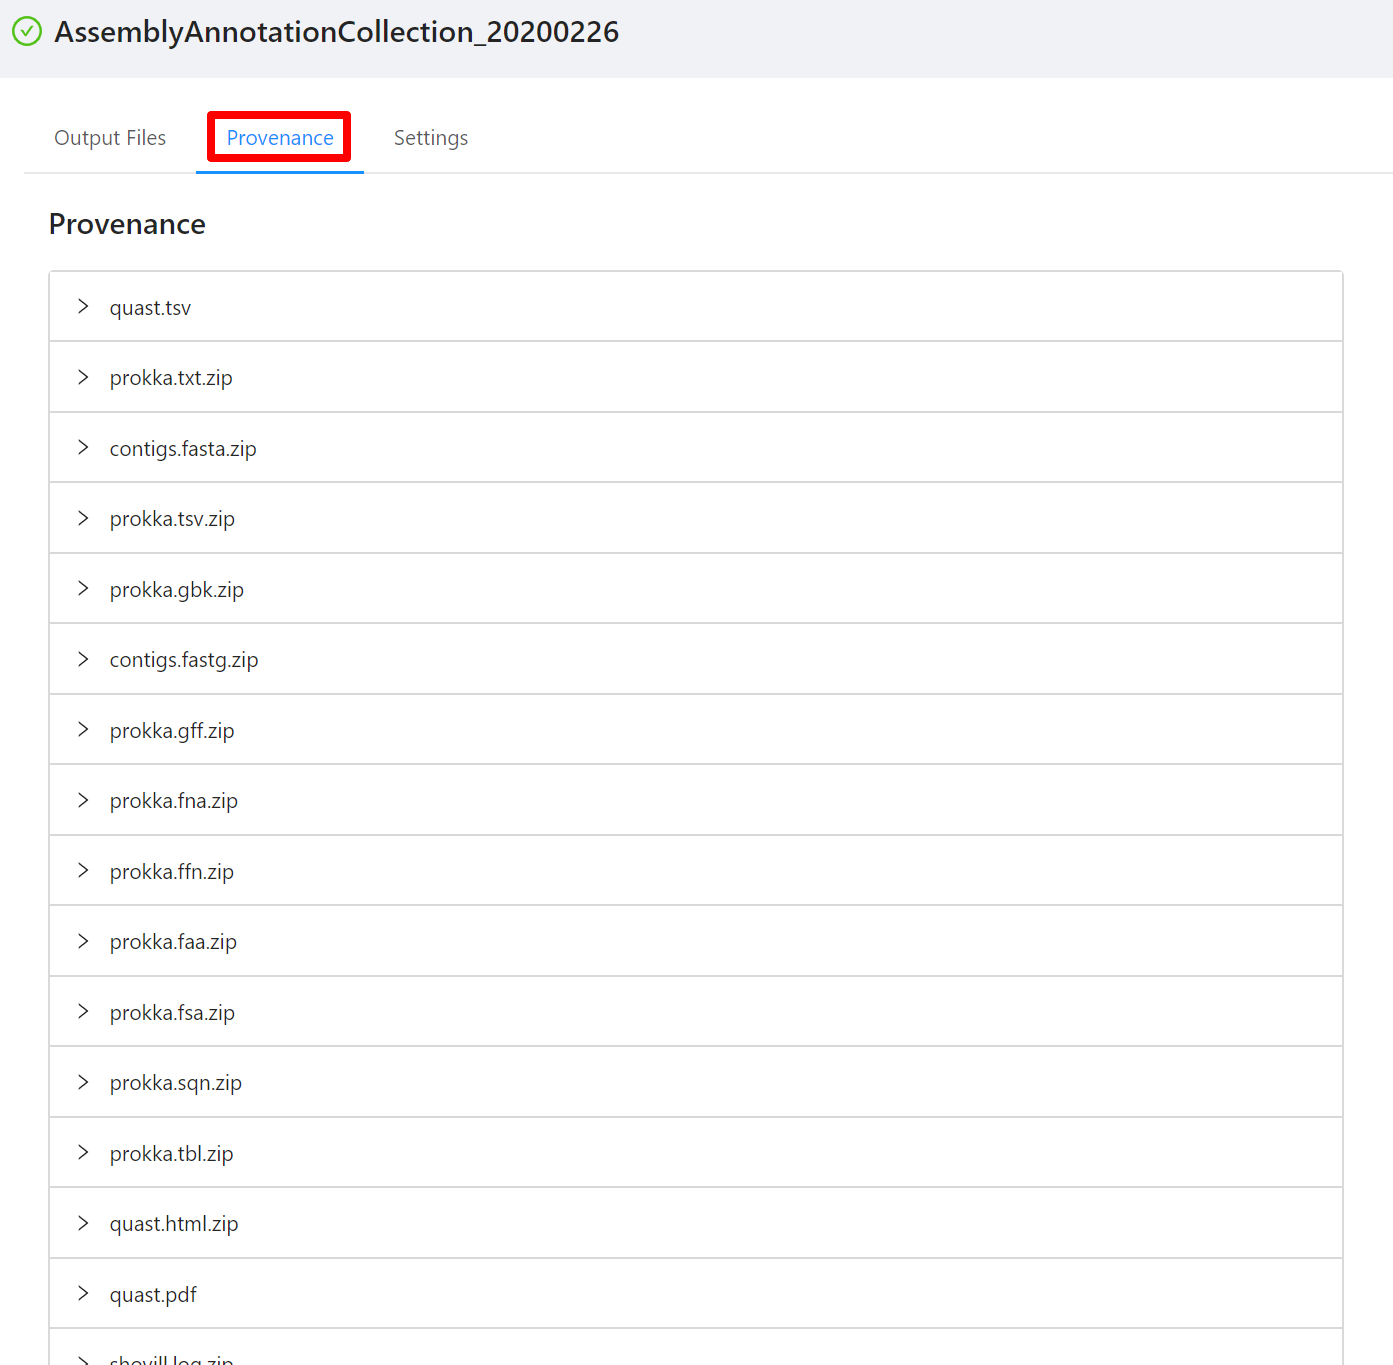
The provenance is displayed on a per file basis. Clicking on quast.tsv file will display it’s provenance. Expanding each tool will display the parameters that the tool was executed with.

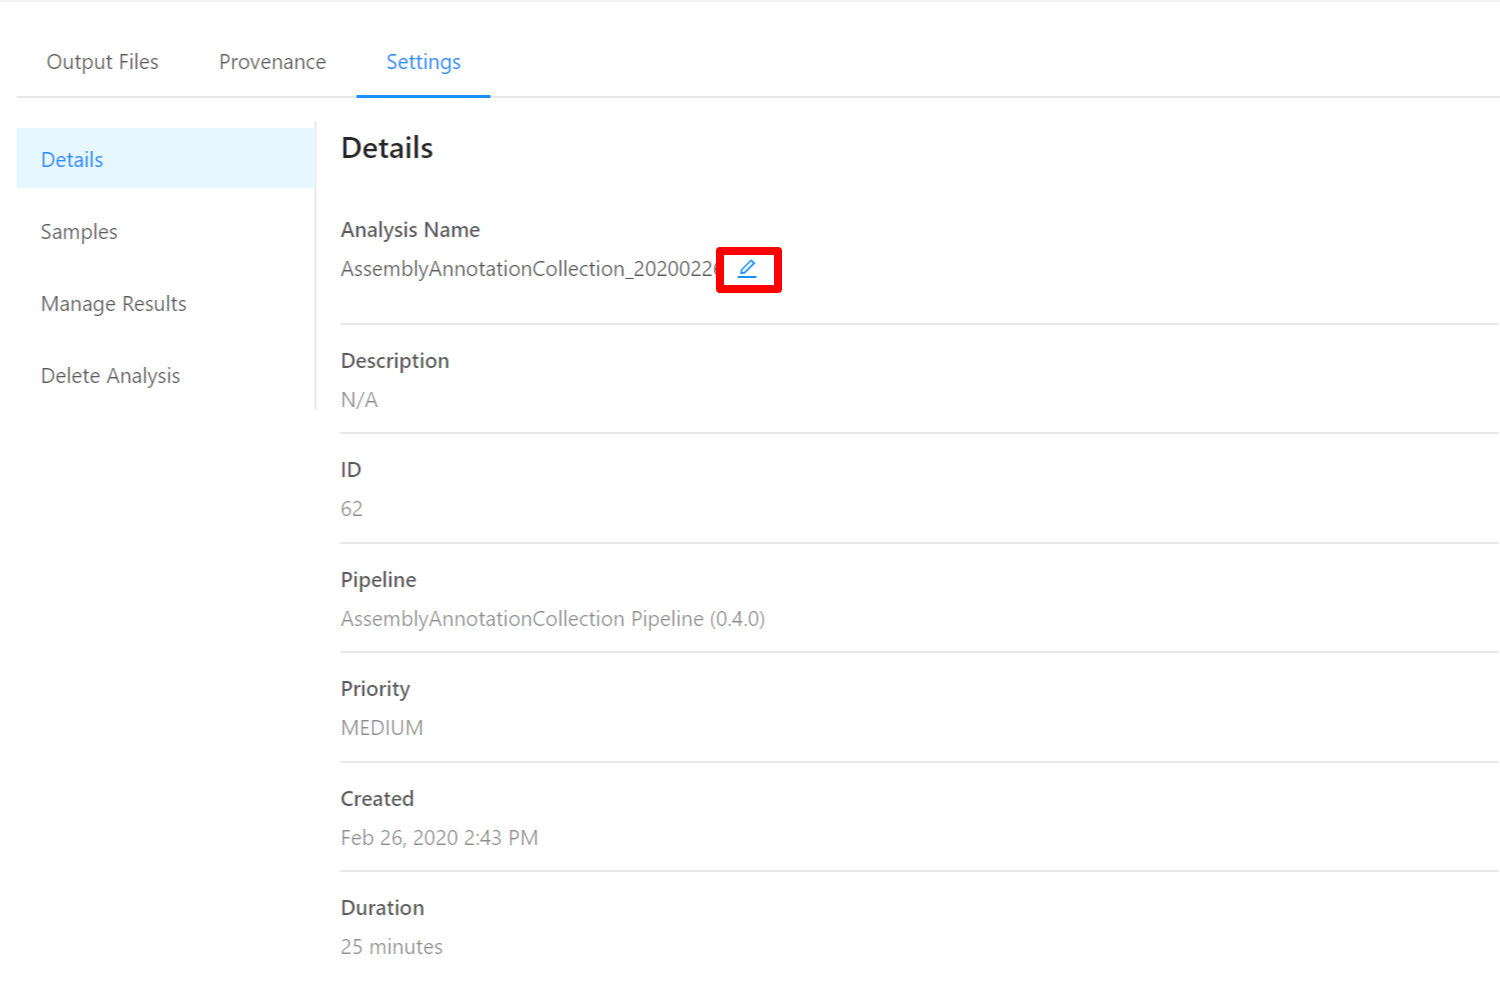
Viewing Pipeline Details
To view analysis details, please select the Settings tab. From here you can view the analysis name, analysis description, analysis id, pipeline and pipeline version used by the analysis, analysis priority, when the analysis was created, and duration of the analysis.
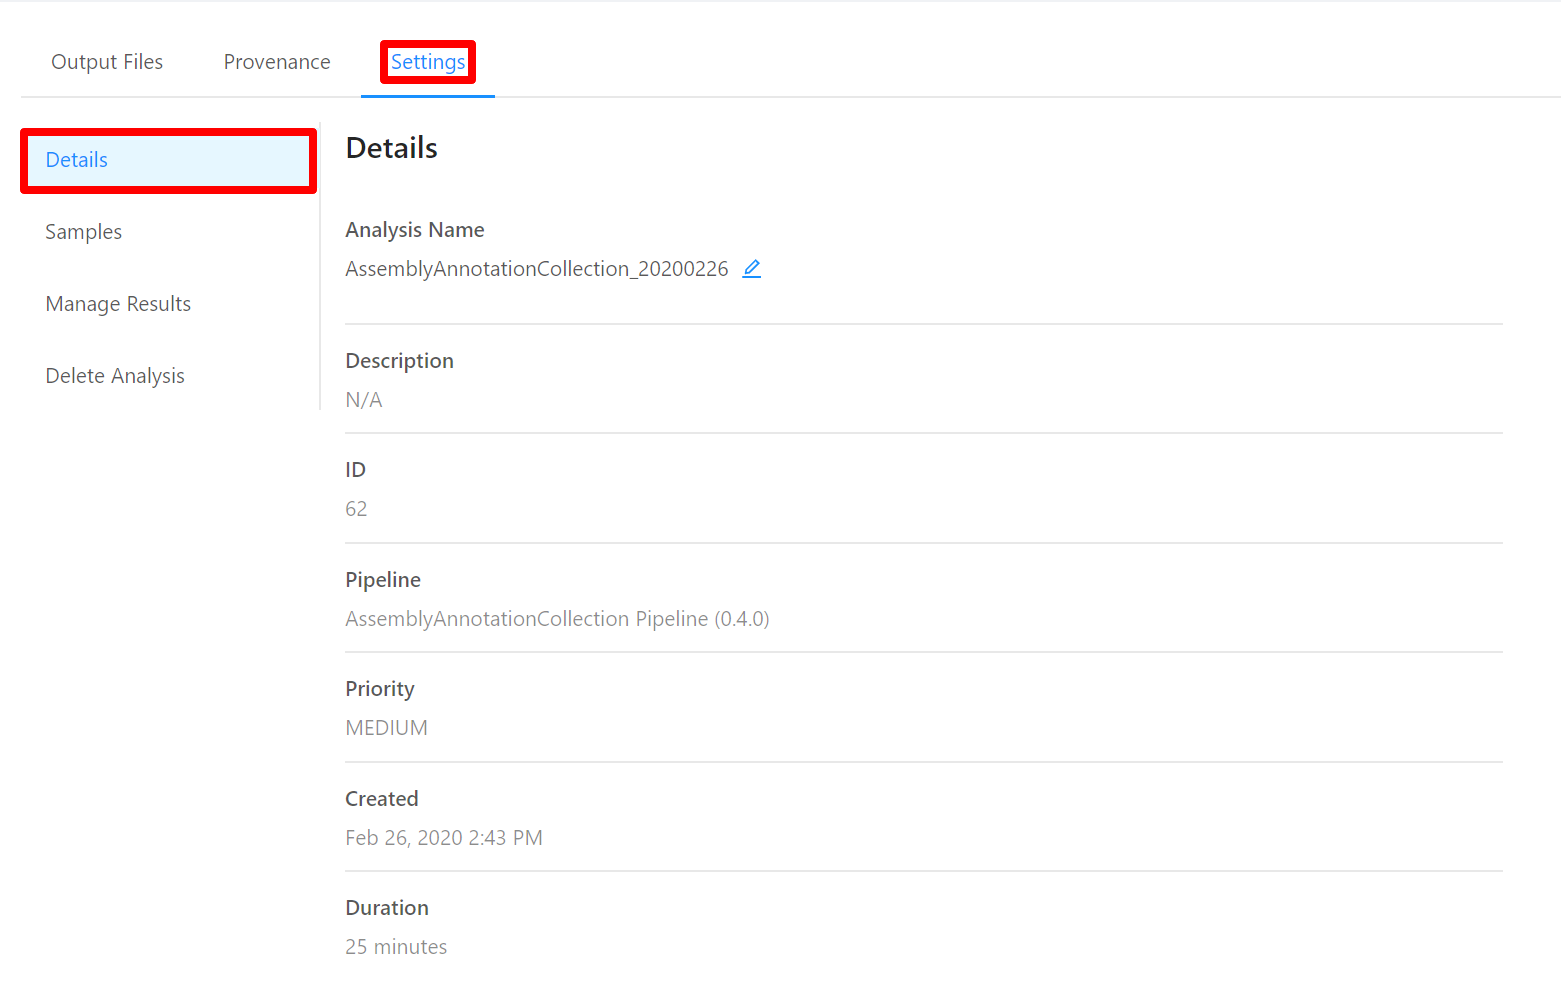
To edit an analysis name, please select the Pencil icon next to the analysis name. Once you have edited the analysis name, pressing the ENTER key on your keyboard or clicking anywhere outside of the text box will update the name. To cancel editing a name you can either hit the ESC key on your keyboard or if the name has not been changed you can also click anywhere outside of the text box.
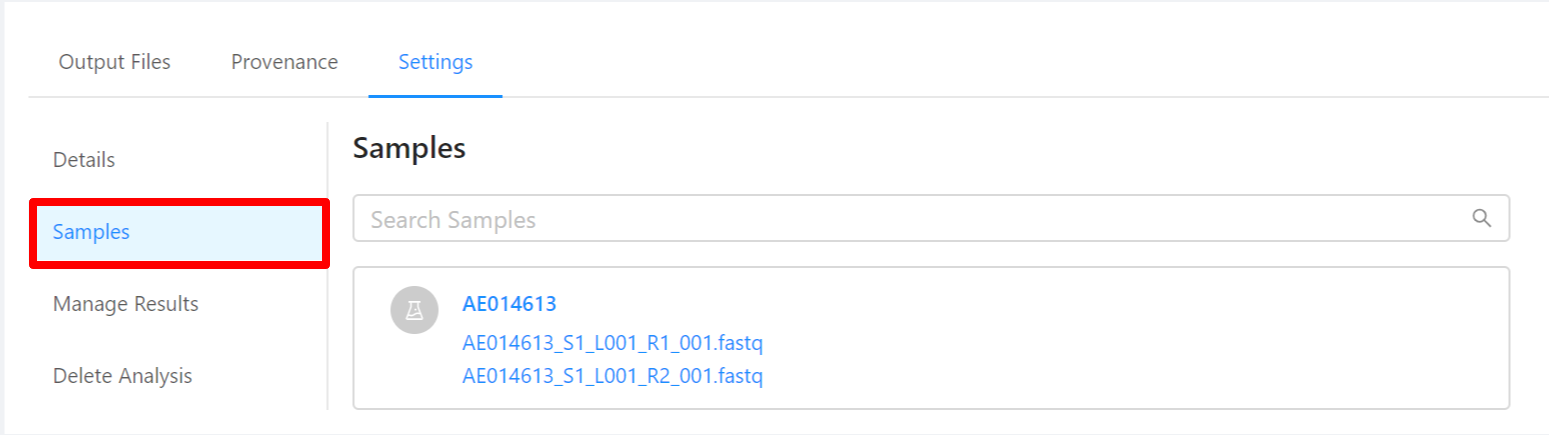
To view samples used by the analysis, please select the Samples tab.
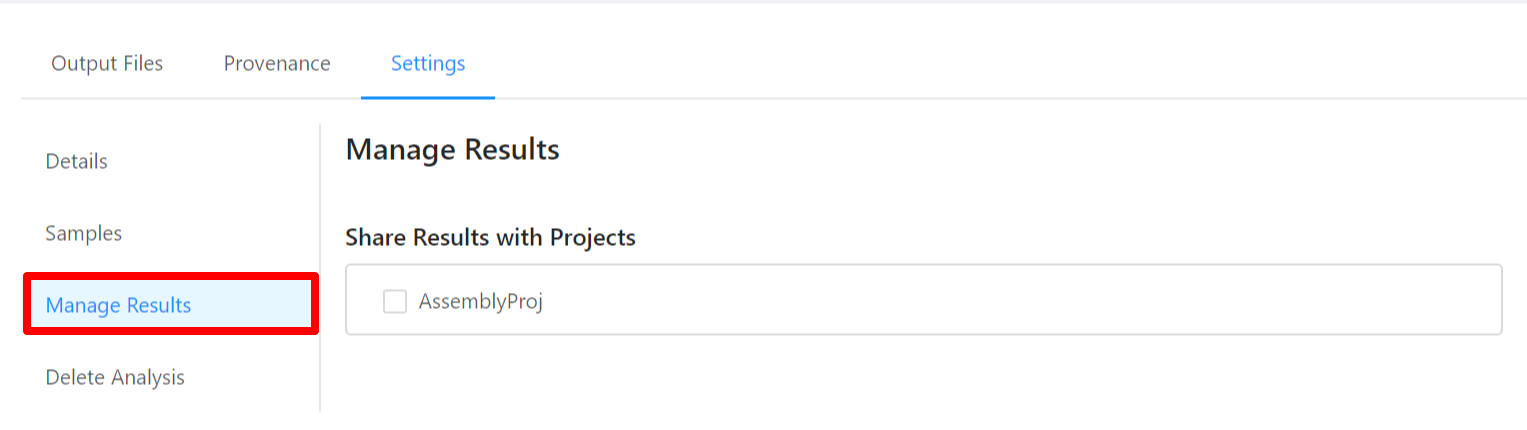
To share analysis results with other projects and/or save results back to samples, please select the Manage Results tab.
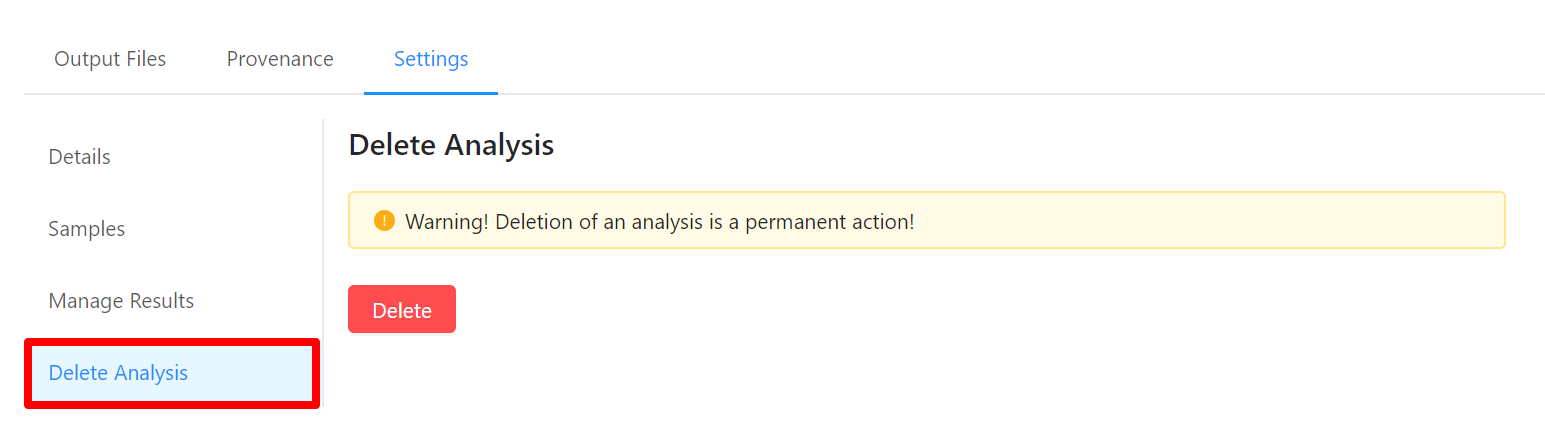
To delete an analysis, please select the Delete Analysis tab.