Building a whole genome SNV Phylogeny with SNVPhyl
This is a quick tutorial on how to construct a whole genome SNV phylogeny with SNVPhyl through IRIDA.
- Initial Data
- Adding Samples to the Cart
- Selecting a Pipeline
- Selecting Parameters
- Running the pipeline
- Monitoring Pipeline Status
- Viewing the Results
- Viewing Provenance Information
- Viewing Pipeline Details
Initial Data
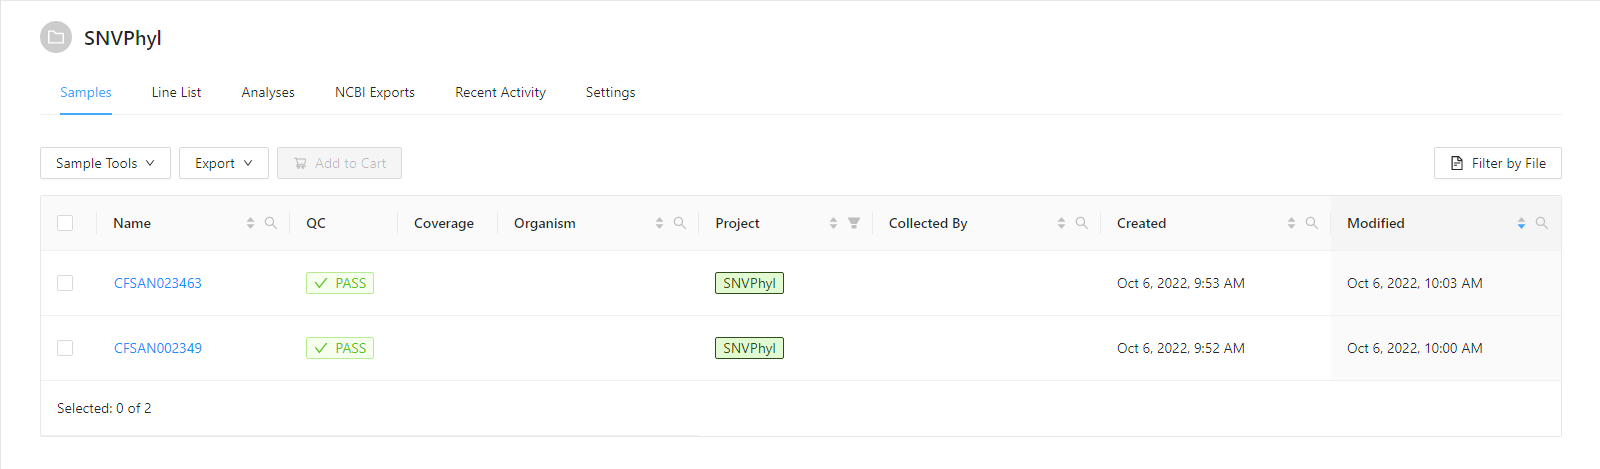
The data for this tutorial comes from https://irida.corefacility.ca/downloads/snvphyl-galaxy/examples/snvphyl-example-lm.tar.gz. It is assumed the sequence files (forward and reverse) CFSAN002349 and CFSAN023463 in fastq/ have been uploaded into appropriate samples as described in the Web Upload Tutorial. Before starting this tutorial you should have a project with samples that appear as:
Adding Samples to the Cart
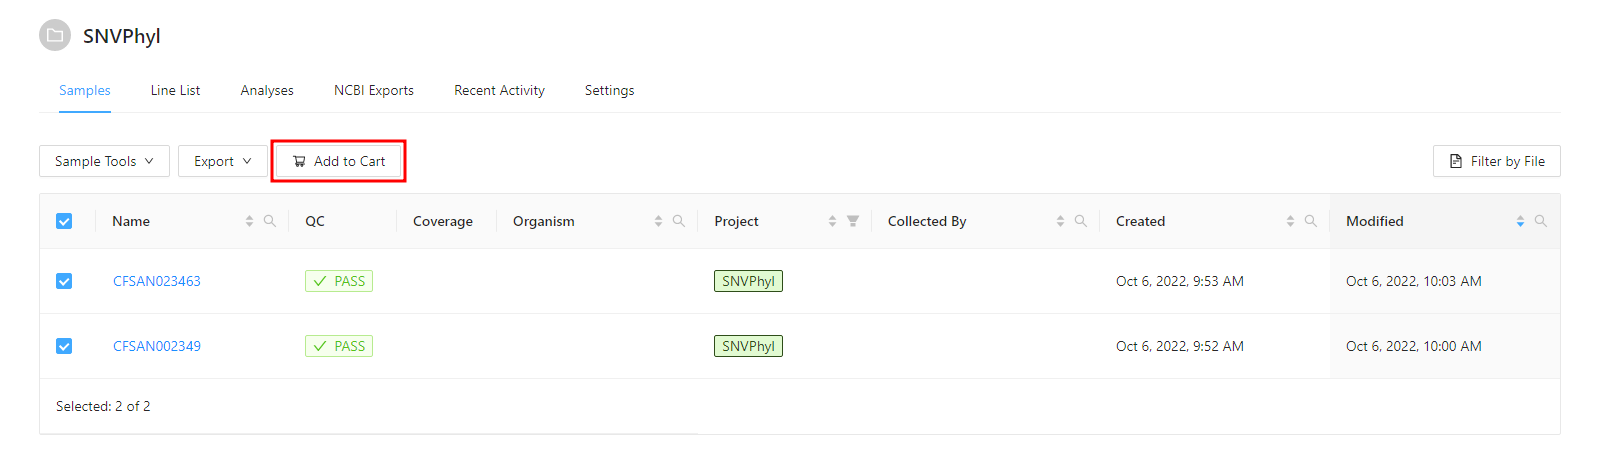
Before a pipeline can be run, a set of samples and sequence read data must be selected and added to the cart. For this tutorial please select the 2 samples and click the Add to Cart button.
Once the samples have been added to the cart, the samples can be reviewed by clicking on the Cart button at the top.

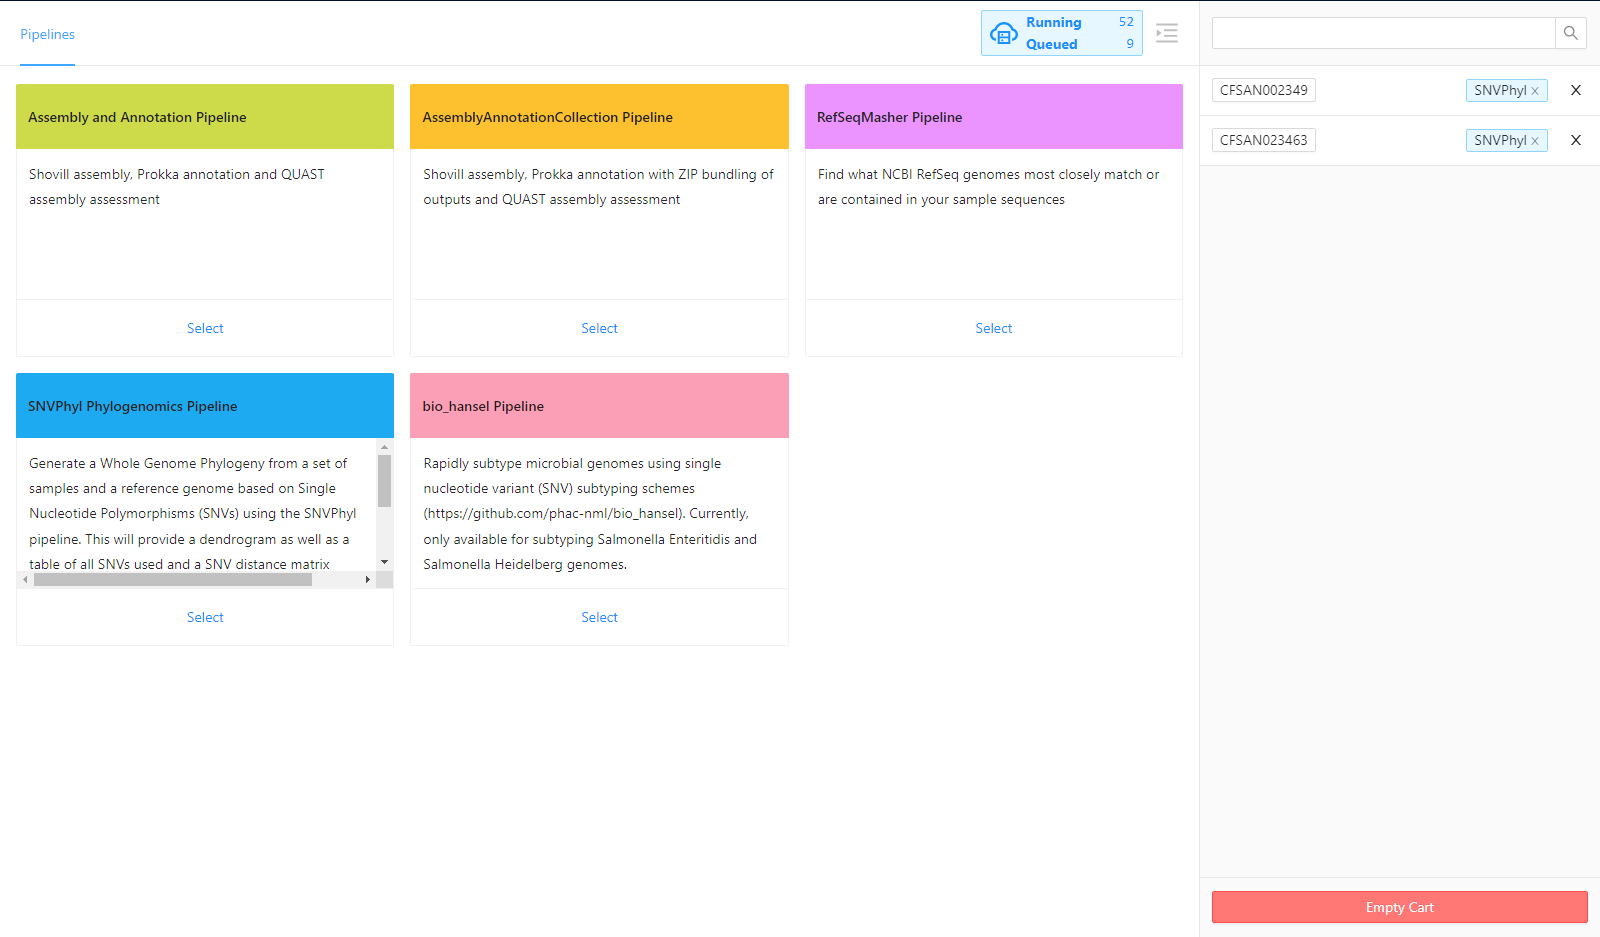
Selecting a Pipeline
For this tutorial, we will select the SNVPhyl Phylogenomics Pipeline.
Selecting Parameters
Once the pipeline is selected, the next page provides an overview of all the input files, as well as the option to modify parameters.
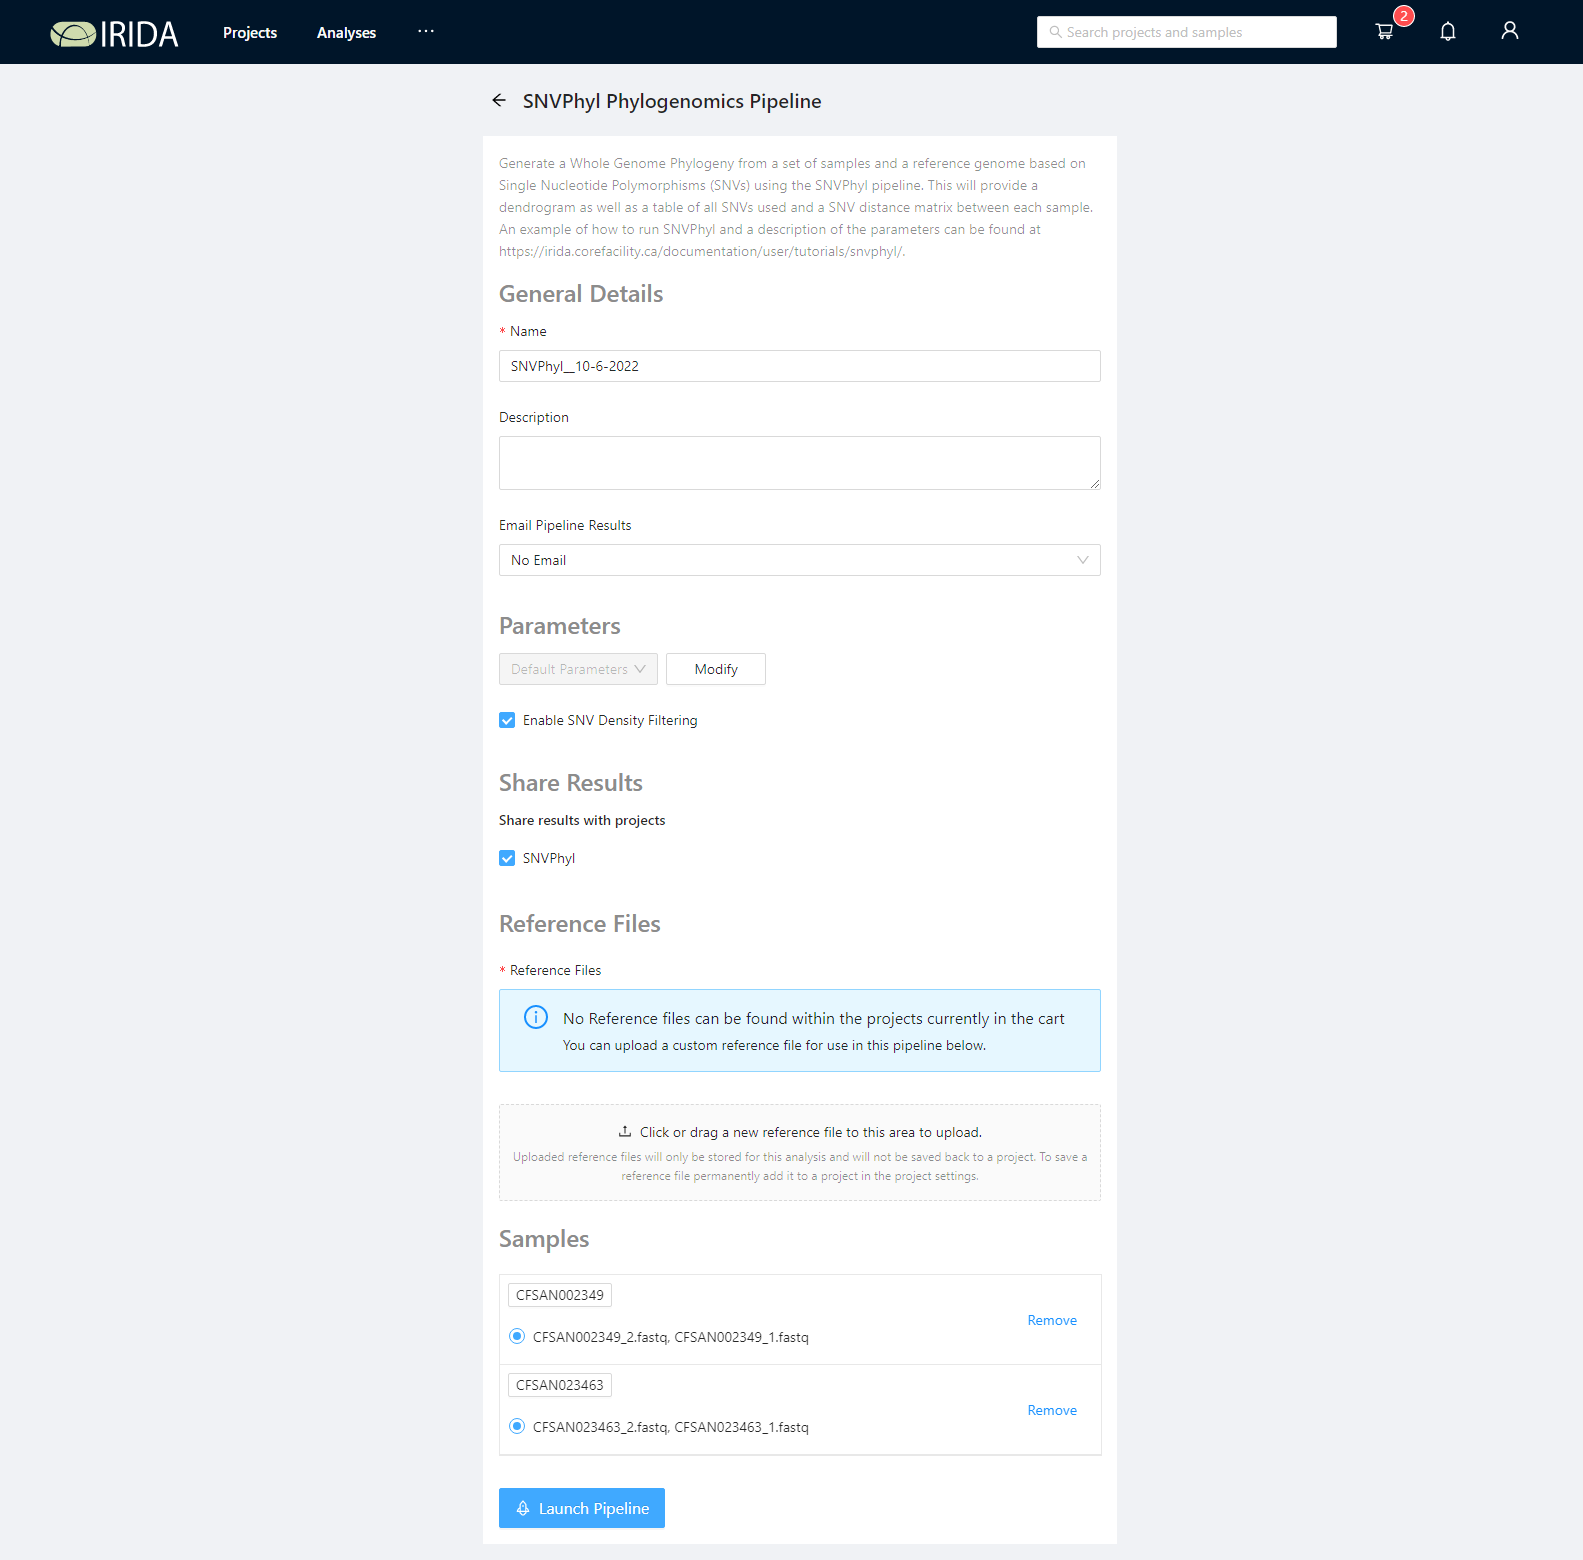
Select a reference genome
SNVPhyl requires a reference genome to be used for mapping sequencing reads and calling variants. This must be uploaded to the project containing the samples to use. There is an example reference file in the sample data package (snvphyl-example-lm). Please upload the file CFSAN023463.fasta by clicking the Click or drag a new reference file to this area to upload. button or by dragging and dropping the files in this area.

Optional parameters
Next, selecting the Modify button brings up a page where parameters can be customized. The default parameters will often be appropriate, so we will use them for now.

Required parameters (density filtering)
One component of the SNVPhyl pipeline is to remove regions with high SNV density (which could suggest possible recombination). This component works well when all genomes under question are fairly closely-related, but when analyzing distantly-related genomes the SNV density filtering may remove too much data. The SNV density filtering can be enabled or disabled using the checkbox provided.

Select the checkbox if all the genomes are closely-related to each other and you wish to remove SNVs in high-density regions (that could be indicative of recombination). The thresholds for SNV removal can be set in the optional parameters section.
Leave the checkbox unchecked if you wish to turn off SNV density filtering. This is useful if you are analyzing genomes that are much more distantly related to each other (and so the SNV density filtering would be likely to remove non-recombinant SNVs).
More information on SNV density filtering can be found in the SNVPhyl documentation.
Running the pipeline
Please select the Launch Pipeline button to start the pipeline.

Once the button is selected, you will be redirected to the pipeline details page.
Monitoring Pipeline Status
At any point, to monitor the status of the launched pipeline, please select the Analysis > Your Analyses menu.

The will bring you to a page where you can monitor the status of each launched workflow.

Clicking the pipeline name SNVPhyl_20200702 will bring you to a page for that analysis pipeline. It will take a while for the SNVPhyl analysis pipeline to complete. Along the top of the page you can check the current step of the analysis and at the bottom of the Details tab you can select if you would like to receive an email upon pipeline completion or error. The email option is only available if the analysis is not in COMPLETED or ERROR state.
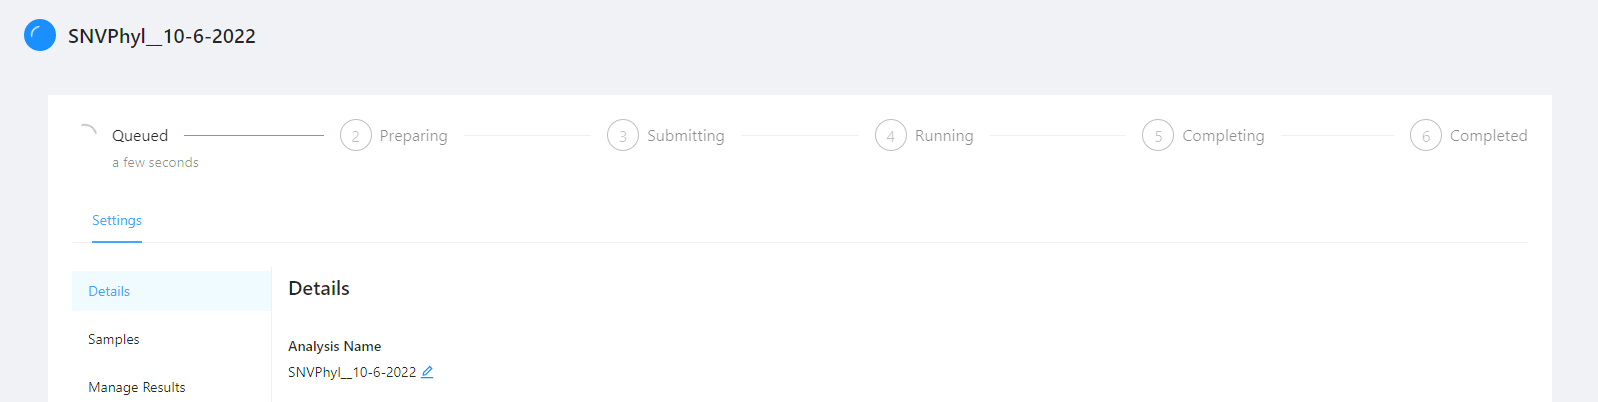
It will take a while the SNVPhyl analysis pipeline to complete.
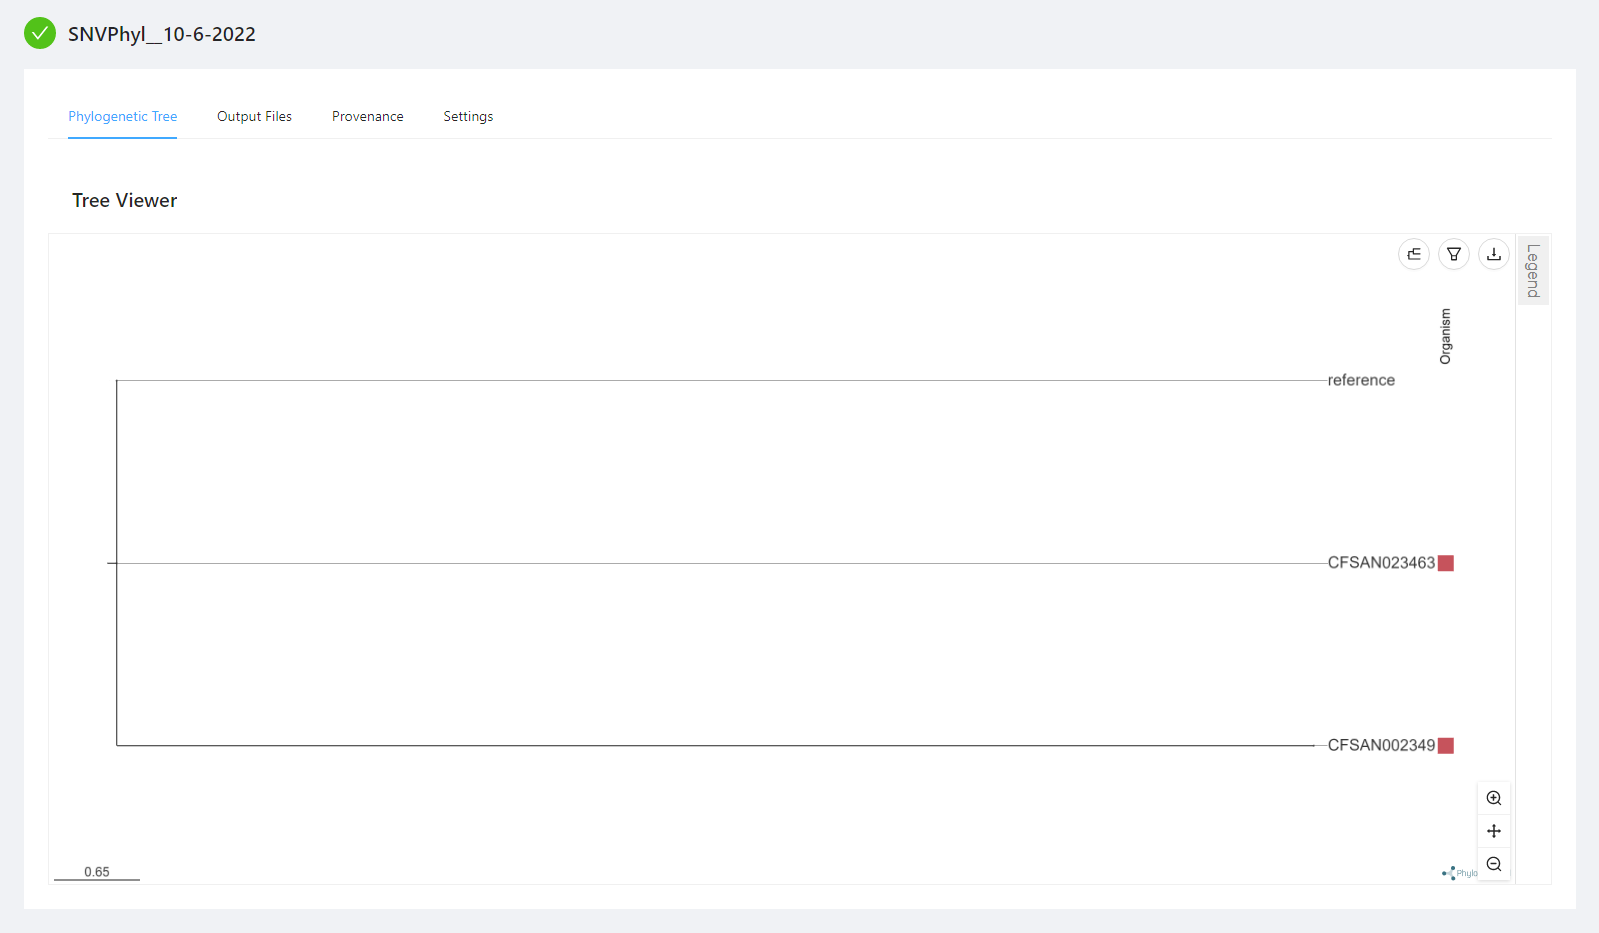
Viewing the Results
Once the pipeline is complete, you will see the generated phylogenetic tree within your browser. To take full advantage of the phylogenetic tree viewer see Advanced Visualizations.
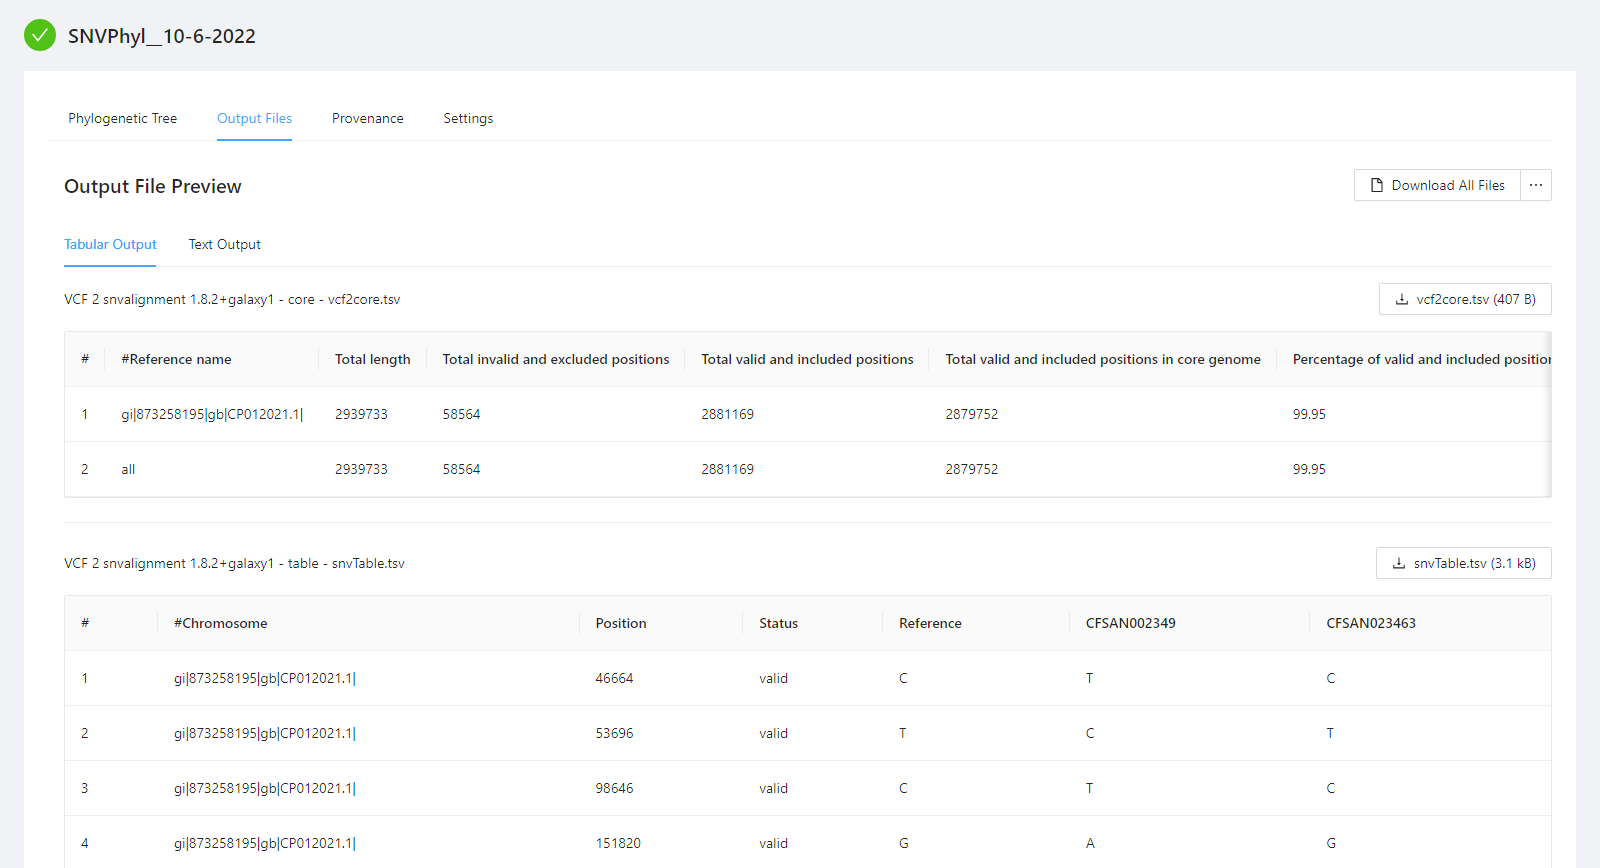
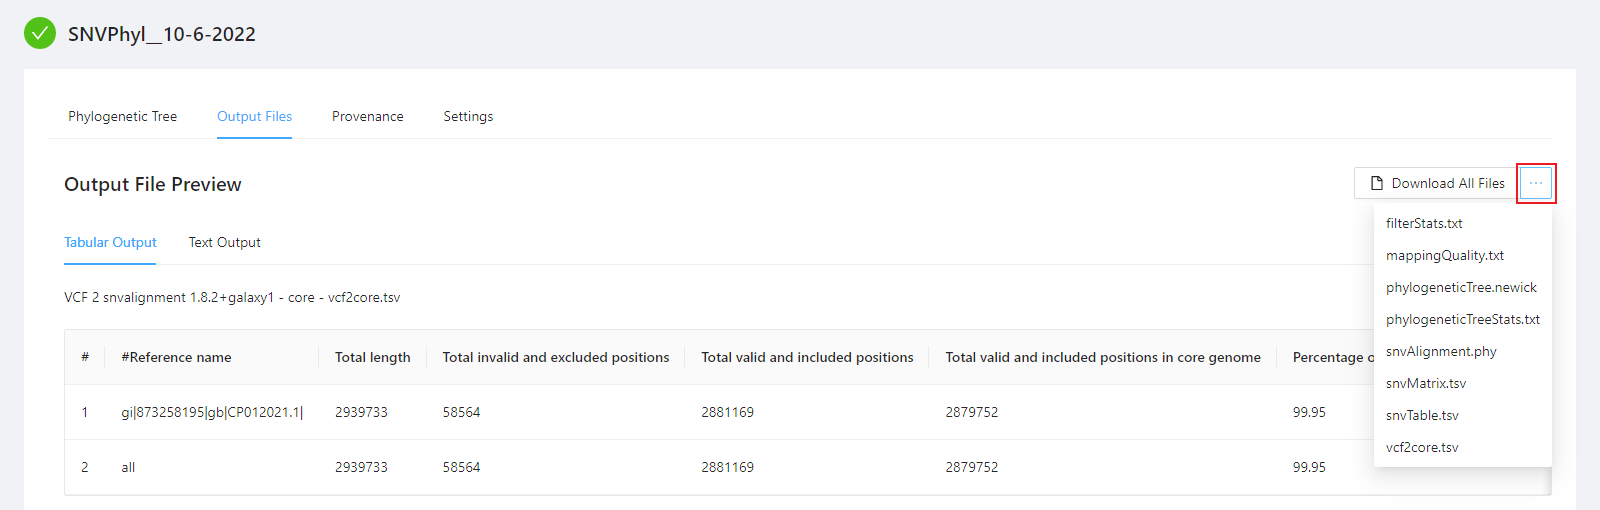
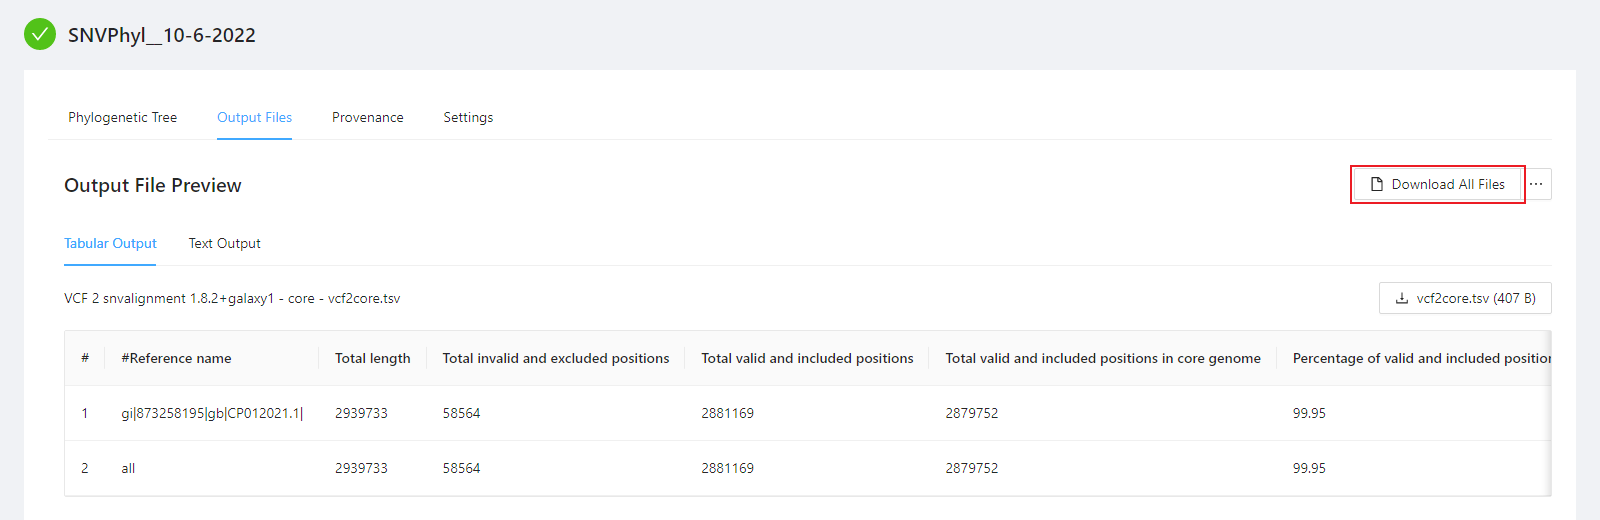
You can view the SNVPhyl analysis output files by selecting the Output Files tab. Note that not all files have an available preview and as such are not displayed in the Output File Preview but are downloaded when selecting the Download All Files button.
To download individual files select the … next to the Download All Files and select the file to download.
To download al the files generated by the analysis, please select the Download All Files button.
A number of files are provided within the download package. These are described below:
vcf2core.tsv: This defines the number of core positions evaluated for constructing the phylogeny.phylogeneticTreeStats.txt: This contains additional information about the constructed tree.phylogeneticTree.newick: This contains the constructed phylogenetic tree in newick format.mappingQuality.txt: This defines the percent of the reference covered by each genome.snvAlignment.phy: This defines a multiple sequence alignment of SNVs used to generate the phylogeny.snvMatrix.tsv: This contains a pair-wise SNV distance matrix.snvTable.tsv: This is a table of the individual variants detected.filterStats.txt: This defines information about the SNVs removed due to poor quality.
More information about interpreting these files can be found in the SNVPhyl Output Guide.
Viewing Provenance Information
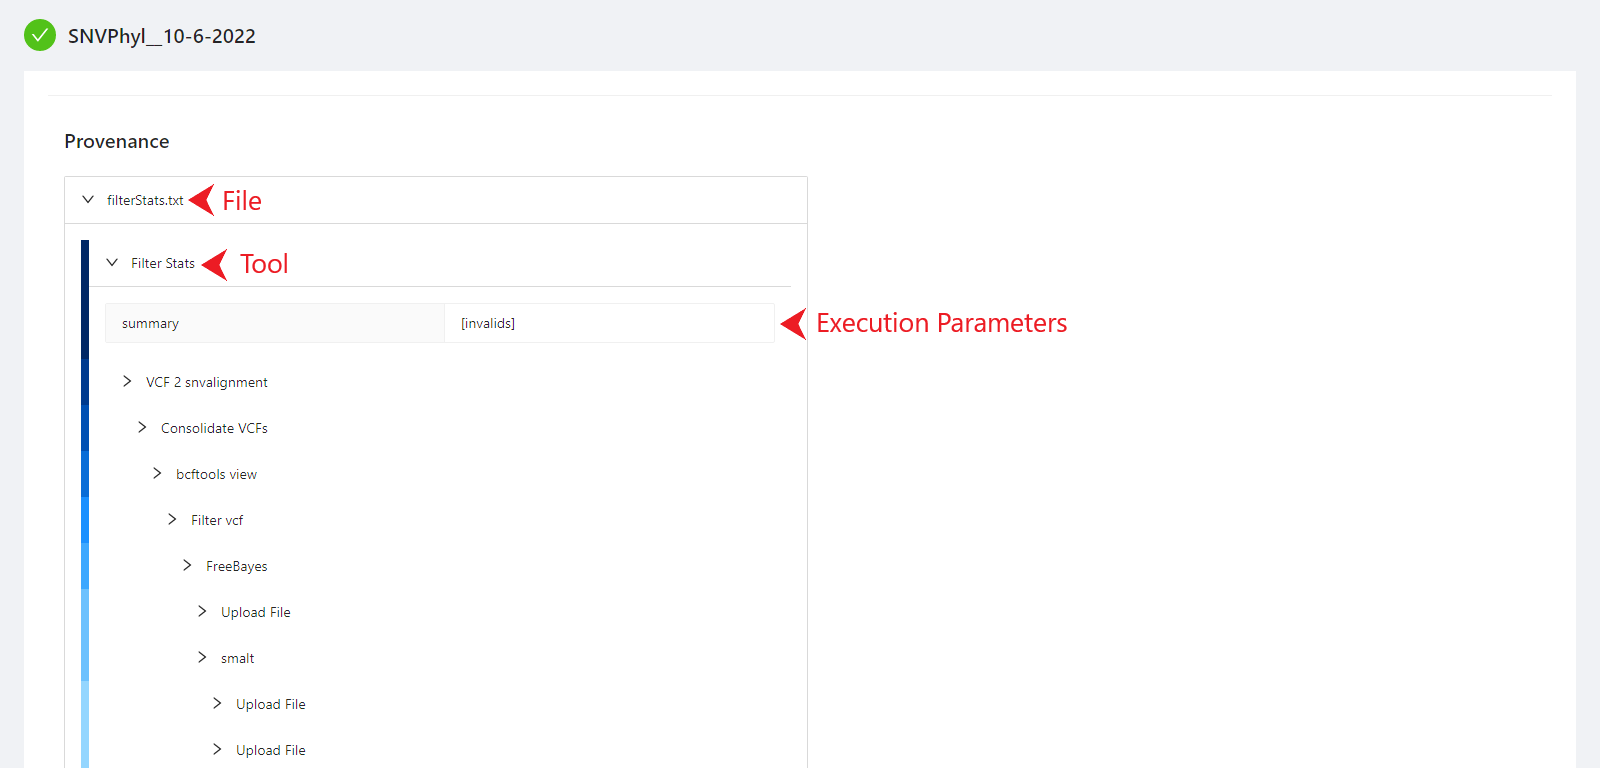
To view the pipeline provenance information, please select the Provenance tab.
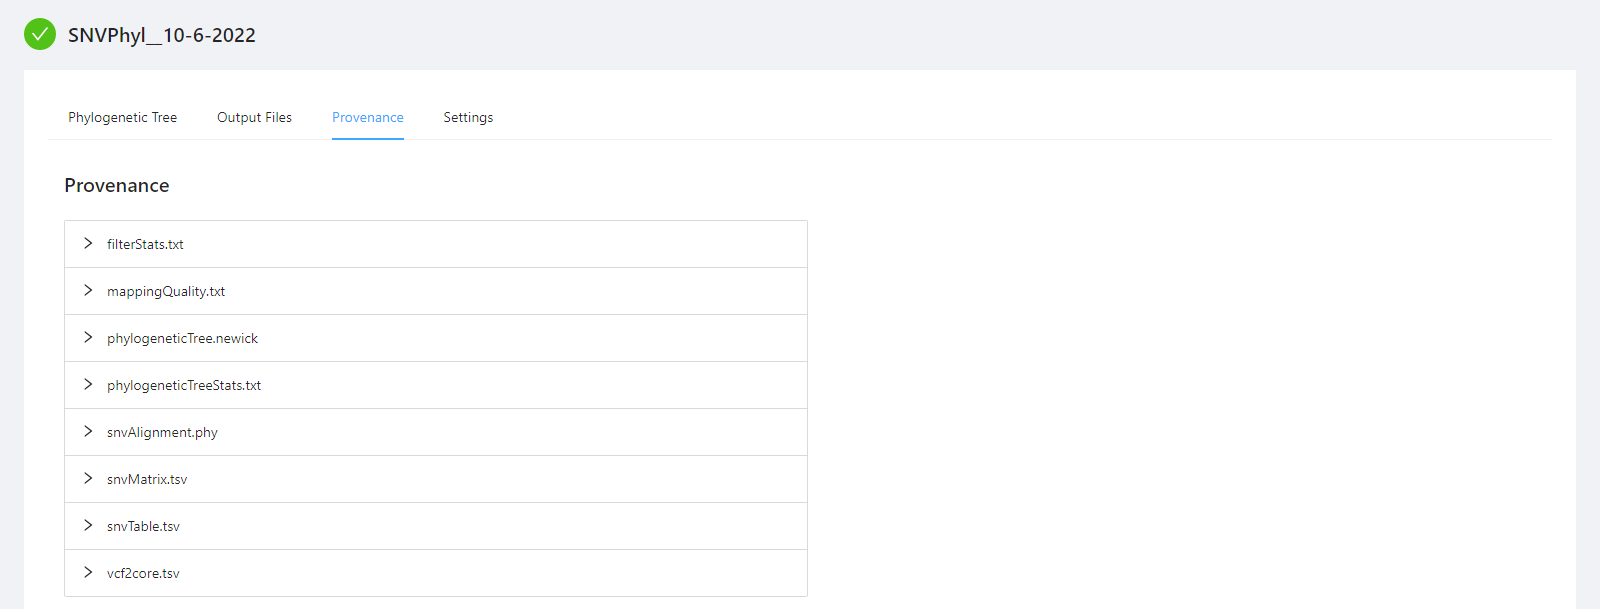
The provenance is displayed on a per file basis. Clicking on filterStats.txt file will display it’s provenance. Expanding each tool will display the parameters that the tool was executed with.
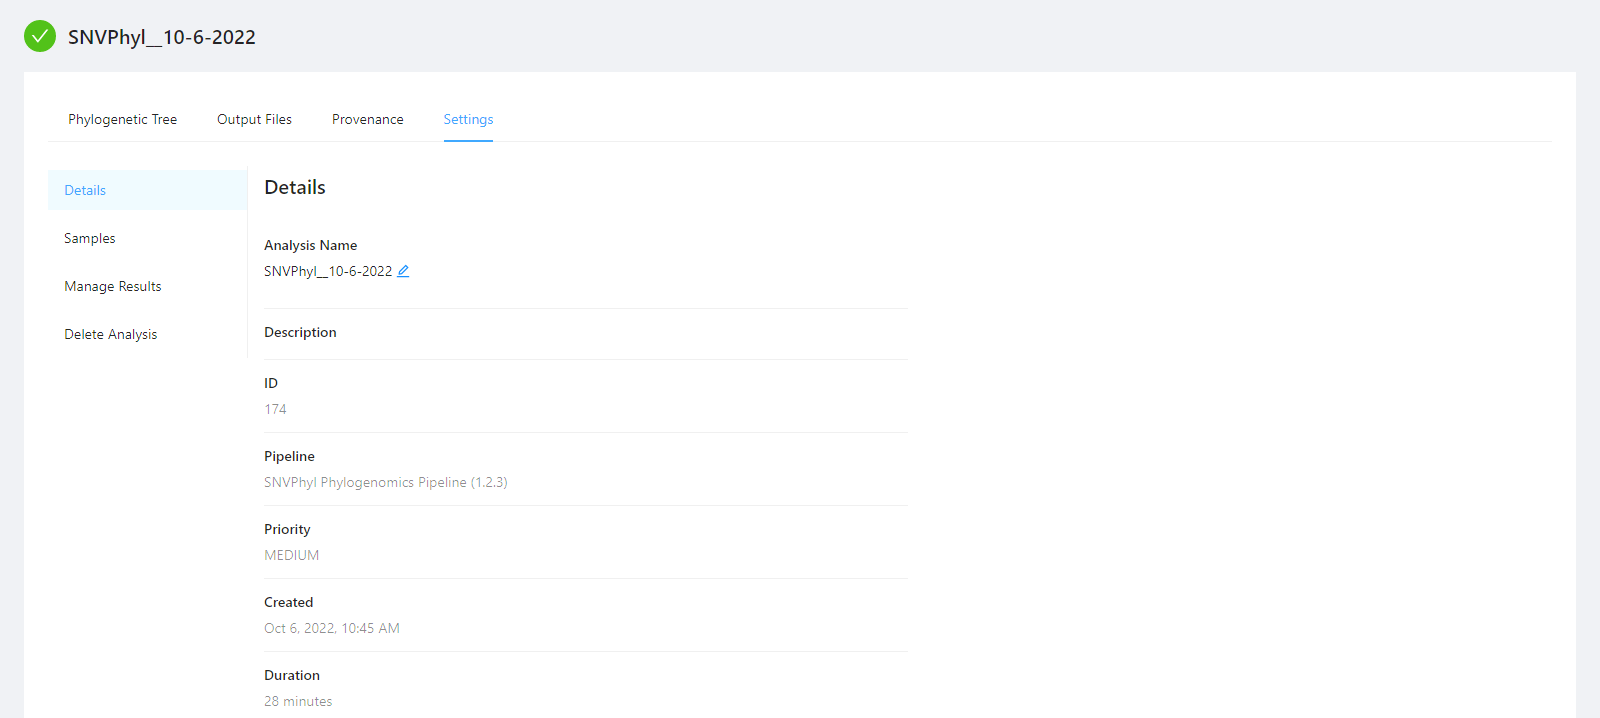
Viewing Pipeline Details
To view analysis details, please select the Settings tab. From here you can view the analysis name, analysis description, analysis id, pipeline and pipeline version used by the analysis, analysis priority, when the analysis was created, and duration of the analysis.
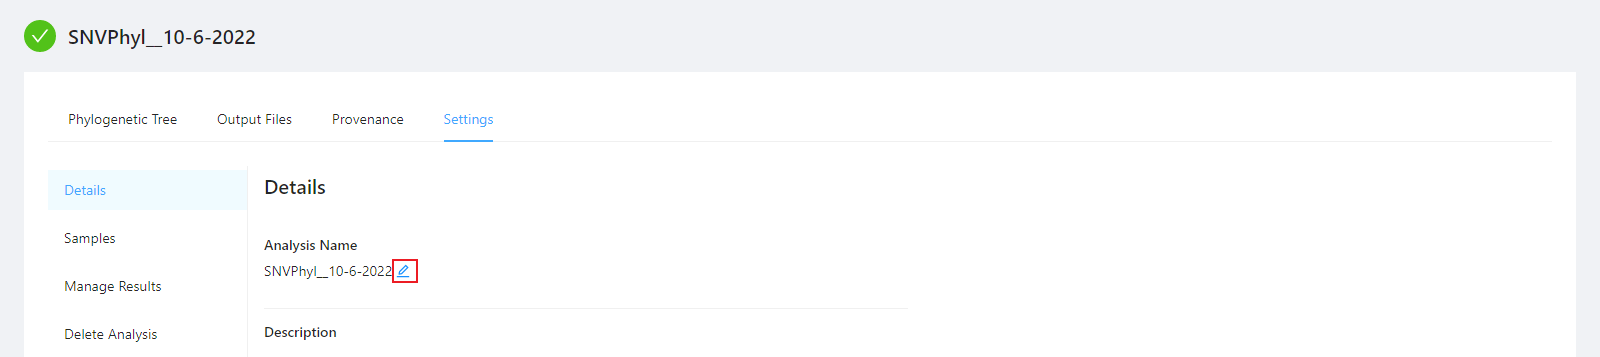
To edit an analysis name, please select the Pencil icon next to the analysis name. Once you have edited the analysis name, pressing the ENTER key on your keyboard or clicking anywhere outside of the text box will update the name. To cancel editing a name you can either hit the ESC key on your keyboard or if the name has not been changed you can also click anywhere outside of the text box.
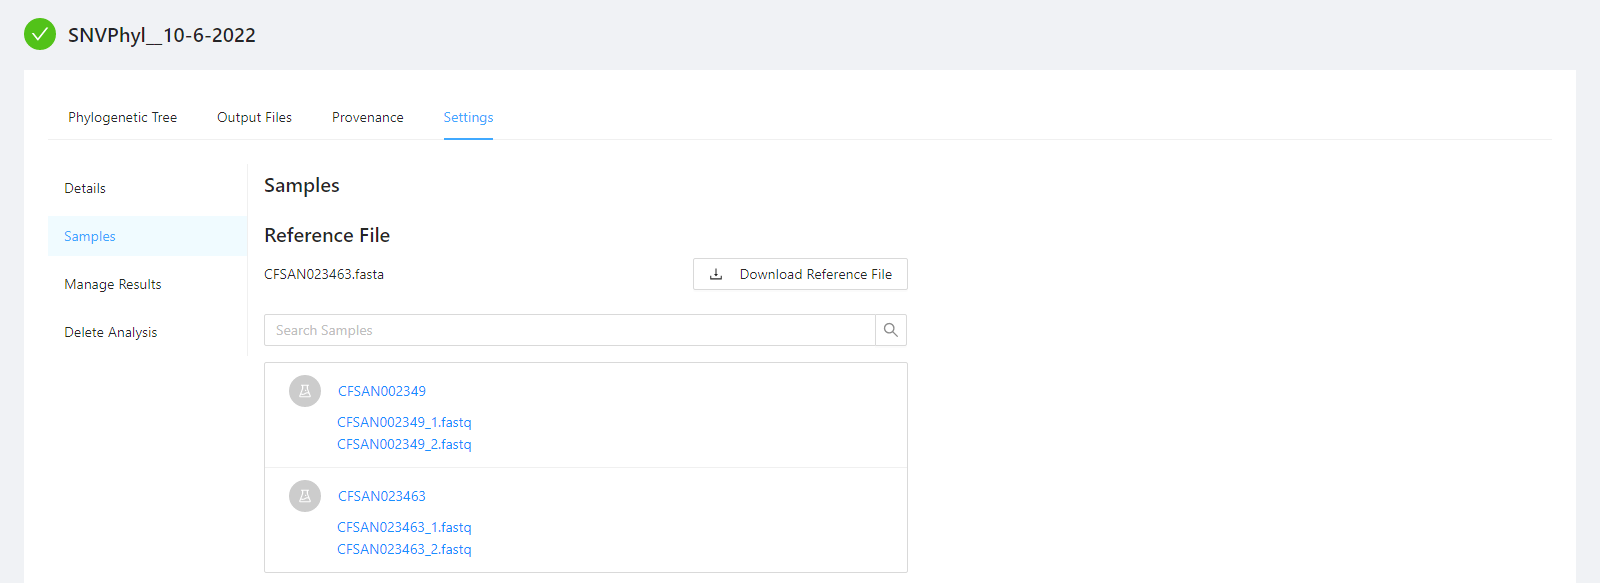
To view samples used by the analysis, as well as, the reference file please select the Samples tab.
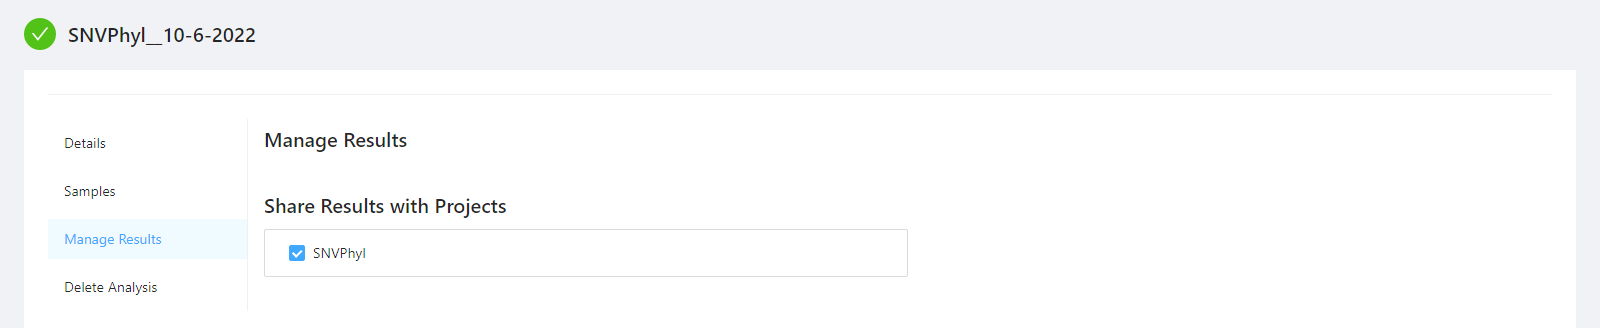
To share analysis results with other projects and/or save results back to samples, please select the Manage Results tab.
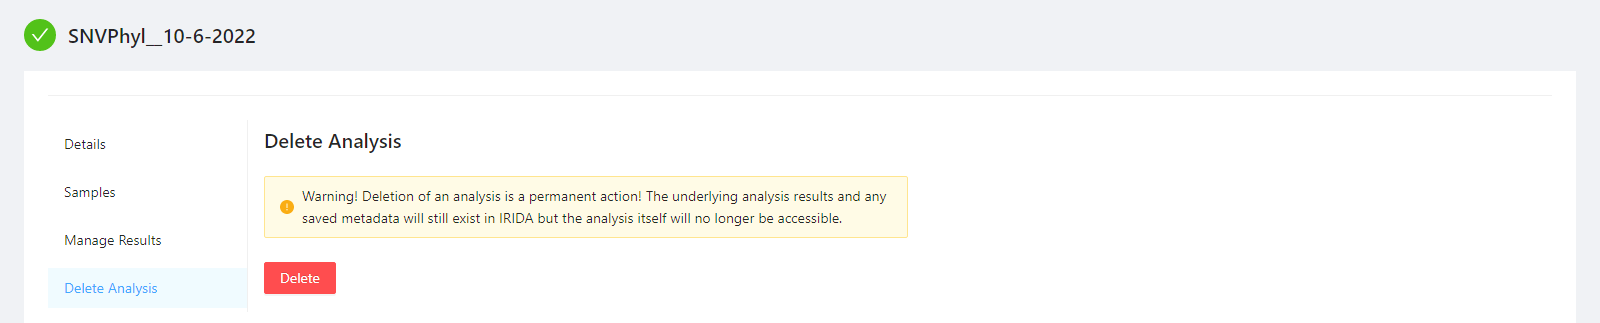
To delete an analysis, please select the Delete Analysis tab.